by indigiseo | Mar 4, 2026 | Health
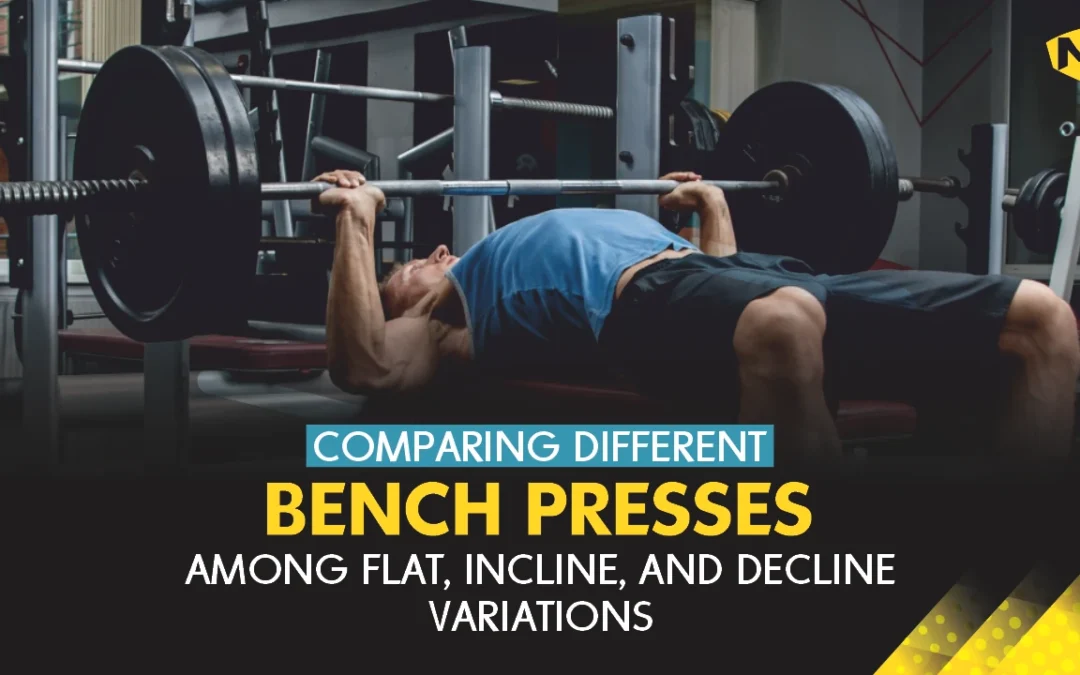
One of the upper body exercises focused chiefly on the chest, shoulders, and triceps is the bench press. The three major variations of the bench press are the flat, incline, and decline bench presses. All of these forms have different advantages and train different parts of the chest muscles. Now, this blog will explain these variations in simple terms so that you know which one to use for your desired physique.
What is a Bench Press?
The bench press is exercised by lying on your back on a bench; you press a weight upwards. It can be done with a barbell, dumbbell, or a machine. The aim is to lower the weight down to your chest and then push it back up. That makes it one of the staple exercises for anyone looking to gain muscle mass and strength in the upper body.
Flat Bench Press
The flat bench press is the most practiced. You lie flat on the bench, pressing the weight upwards, developing your chest overall.
Muscles Worked
The Flat Bench Press targets mainly the middle part of your chest, the front of your shoulders, and your triceps.
How to Do This Exercise?
- Lie flat on a bench with your feet planted on the ground.
- Grip a barbell with hands slightly wider than shoulder-width.
- Lower the weight to your chest, just above the nipple line.
- Press the barbell back up until your arms are fully extended.
- Repeat for the desired number of repetitions.
Benefits of Flat Bench Press
- Development of chest muscles: A Flat Bench Press will provide the overall development of your chest muscles.
- Core Stability: This exercise does a great deal of work in building core strength by stabilizing the weight.
- Simplicity: It is very simple and easy, making it a good starting point for beginners.
Incline Bench Press
The Incline bench press occurs on a bench that is set to an angle. Normally, this angle is anywhere between 30 and 45 degrees. This variation shifts focus to the upper chest and the shoulders.
Muscles Worked
The incline bench press on chest targets the upper chest and places a greater emphasis on the anterior deltoids than the flat bench press does.
How to Do This Exercise?
- Adjust the bench at an angle so that it’s on an incline.
- Lie back on your bench with your feet flat on the floor.
- Grip a barbell with your hands slightly wider than shoulder-width apart.
- Lower the barbell down to your chest, toward the collarbone.
- Press the barbell up to full extension.
- Repeat as necessary for the number of repetitions.
Benefits of Incline Bench Press
- Upper Chest Focus: This variation focuses on the upper chest, which significantly enhances the overall appearance of your chest.
- Improved Shoulder Strength: The incline angle hits the shoulders harder.
- Variety In Exercises: It adds variety to your workout routine, hence reducing muscle imbalances.
Decline Bench Press
Decline bench press is on a bench set on an angle downward. This variation thus activates the lower part of the chest more and involves the triceps to a greater degree.
Muscles Worked
This variation still works more on the lower part of the chest but involves the triceps a bit more than the above variations.
How to Do This Exercise?
- Move the bench to a downward angle.
- Lie back and put your feet under the foot pads.
- Grip the barbell with your hands slightly wider than shoulder-width apart Lower the barbell towards your lower chest.
- Press the barbell back up until your arms are extended
- Repeat for desired repetitions.
Benefits of Decline Bench Press
- Lower chest focus: This variation is excellent for targeting the lower chest, which can improve the overall definition of your chest.
- Reduced shoulder strain: The decline angle can be easier on the shoulders.
- Increase triceps engagement: This exercise engages the triceps more and helps to develop arm strength.
Bench Press on Machine
You can perform the bench press on a machine, such as a smith or a chest press machine. Machines guide the movement, making the exercise more controlled and safe, especially for beginners.
Muscles Worked
Machine bench presses do much the same thing as the free weight options— chest, shoulders, and triceps, but the range of motion tends to be shorter.
How to Do This Exercise?
- Adjust the height of the machine so that it is comfortable.
- You can either sit or lie down on the machine, depending on how its design suits you.
- Grasp handles or bars with a wider-than-shoulder-width grip.
- Press the weight up by fully extending your arms.
- Lower weight slowly down again.
- Do for reps.
Benefits of Bench Press on Machine
- Controlled motion: The machines limit your movement, which teaches you proper form if you’re new to weight-lifting.
- Safety: They minimize the risk of injury, especially when you’re working with heavier weights and alone in the gym.
- Muscle focus: This also puts your mind into the muscles you are working on as you don’t need to maintain your balance.
What Kind of Bench Press is for You?
The flat bench press works well for the overall development of the chest and the first way of doing it depends on the fitness goal you have in mind. If you want to build your upper chest, we suggest you do the incline bench press. But if you want to focus on the lower chest, it’s best to stick with the decline bench press.
If you’re a beginner, though, or have safety concerns, a machine bench press provides a controlled environment where you can learn proper form.
Conclusion
The bench press is a very broad-ranging exercise, with variations utilized to hit the chest and upper body differently. Integrate bench presses-flat, incline, and decline-along with machine presses into your workouts for a great overall chest and upper body. Just make sure to perform the movement correctly, begin with a suitable weight, and adjust as necessary to achieve your goals.
Want to master the perfect bench press? Join MultiFit Gym and let our trainers help you with flat, incline, and decline variations to reach your fitness goals.

by indigiseo | Mar 1, 2026 | Health
Best Healthy Diet Plan to Lose Weight
Losing weight doesn’t have to be hard. By creating a proper diet plan, your fitness journey can be enjoyable and rewarding.
But how would you exactly be able to understand what to eat and what to avoid?
Fear not! In this article, we got you covered with the best healthy diet plan to lose weight.
Why a Healthy Diet Plan is Essential
Before diving in, we should understand why having a diet plan is necessary. A good, balanced diet provides your body with the essential nutrients, vitamins, and minerals it needs to function efficiently.
By having it right, you boost your metabolism, increase your energy levels, and naturally support weight loss.
Your 7-Day Weight Loss Diet Plan
Ready to get started? Here’s a sample 7-day diet plan for weight loss while enjoying delicious and nutritious meals.
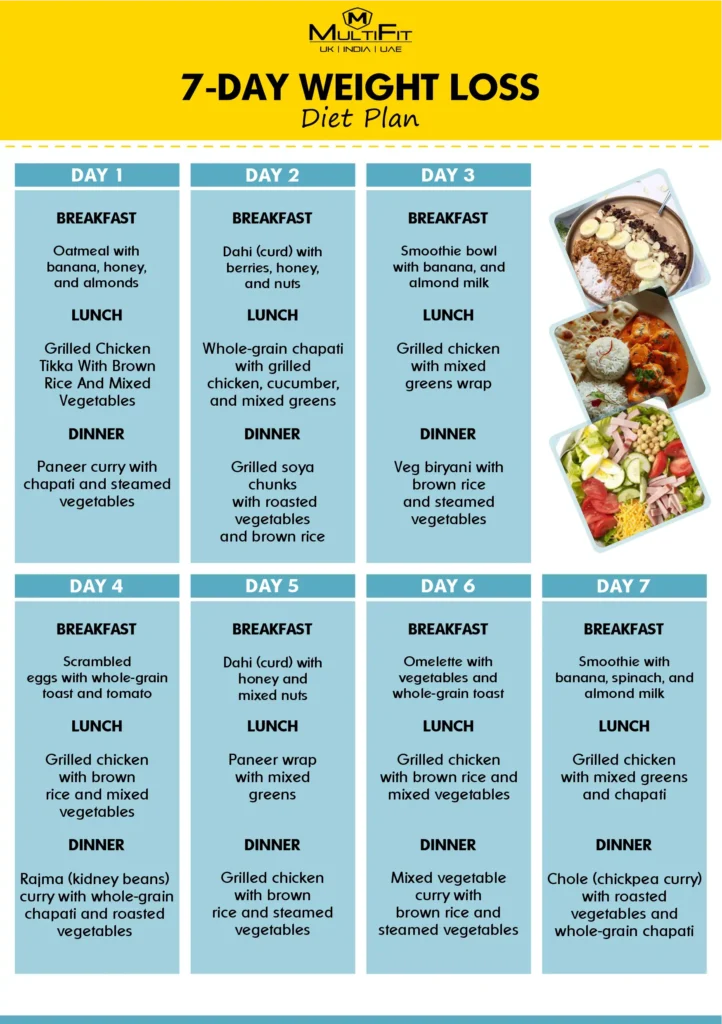
7-Day Diet Plan for Weight Loss
Day 1:
Breakfast: Oatmeal with banana, honey, and almonds
Lunch: Grilled chicken tikka with brown rice and mixed vegetables
Dinner: Paneer curry with chapati and steamed vegetables
Day 2:
Breakfast: Dahi (curd) with berries, honey, and nuts
Lunch: Whole-grain chapati with grilled chicken, cucumber, and mixed greens
Dinner: Grilled soya chunks with roasted vegetables and brown rice
Day 3:
Breakfast: Smoothie bowl with banana, and almond milk
Lunch: Grilled chicken with mixed greens wrap
Dinner: Veg biryani with brown rice and steamed vegetables
Day 4:
Breakfast: Scrambled eggs with whole-grain toast and tomato
Lunch: Grilled chicken with brown rice and mixed vegetables
Dinner: Rajma (kidney beans) curry with whole-grain chapati and roasted vegetables
Day 5:
Breakfast: Dahi (curd) with honey and mixed nuts
Lunch: Paneer wrap with mixed greens
Dinner: Grilled chicken with brown rice and steamed vegetables
Day 6:
Breakfast: Omelette with vegetables and whole-grain toast
Lunch: Grilled chicken with brown rice and mixed vegetables
Dinner: Mixed vegetable curry with brown rice and steamed vegetables
Day 7:
Breakfast: Smoothie with banana, spinach, and almond milk
Lunch: Grilled chicken with mixed greens and chapati
Dinner: Chole (chickpea curry) with roasted vegetables and whole-grain chapati
Nutrition Basics for Weight Loss
A balanced nutrition diet plan to lose weight should include:
Proteins: Lean sources like chicken, soya chunks, paneer, and dal.
Healthy Fats: Nuts, seeds, and dahi (curd).
Carbohydrates: Brown rice, chapati, and bread.
Lose Weight Food Chart
Here’s a handy lose-weight food chart with affordable food options:
Fruits: Apples, bananas, mangoes
Vegetables: Broccoli, spinach, bell peppers
Protein: Chicken, paneer, soya chunks, dal
Healthy Fats: Nuts, seeds, dahi (curd)
Complex Carbohydrates: Brown rice, chapati, bread
(Disclaimer: The diet plan provided is tailored to individual needs and may vary based on specific requirements. Individuals with medical conditions should consult their doctor before following the diet plan.)
Conclusion
Come out of procrastination and fight against the fear of weight gain. Follow a well-prepared diet plan and that will turn your whole lifestyle. By going through and understanding our best healthy diet plan to lose weight, with a detailed diet table for weight loss and a 7-day diet plan for weight loss, achieve your weight loss goals and maintain overall health and well-being.
Ready to transform your health journey? Join MultiFit today and get personalized nutrition and training plans to help you achieve your weight loss goals!
by indigiseo | Feb 28, 2026 | Aasan, Blog, Exercises, Health, Pranayama
7 Mind-Blowing Benefits of Jnana Mudra for the Mind, Body & Soul
Have you ever felt overwhelmed with stress or found it hard to focus when life picks up speed?
I sure have. A simple hand position, jnana mudra benefits can help you regain clarity, calm, and well-being.
Less than two minutes with this hand position, will help you feel grounded and ready to engage in life in a more positive, fruitful way.
So, let’s dive in deep on what Jnana Mudra is all about.
What is Jnana Mudra and How to Do It?
The term jnana mudra means by having wisdom, that is, ‘jnana’ refers to ‘wisdom’ and ‘mudra’ refers to ‘gesture’.
It is also referred to as the gesture of knowledge.
How to Do it?
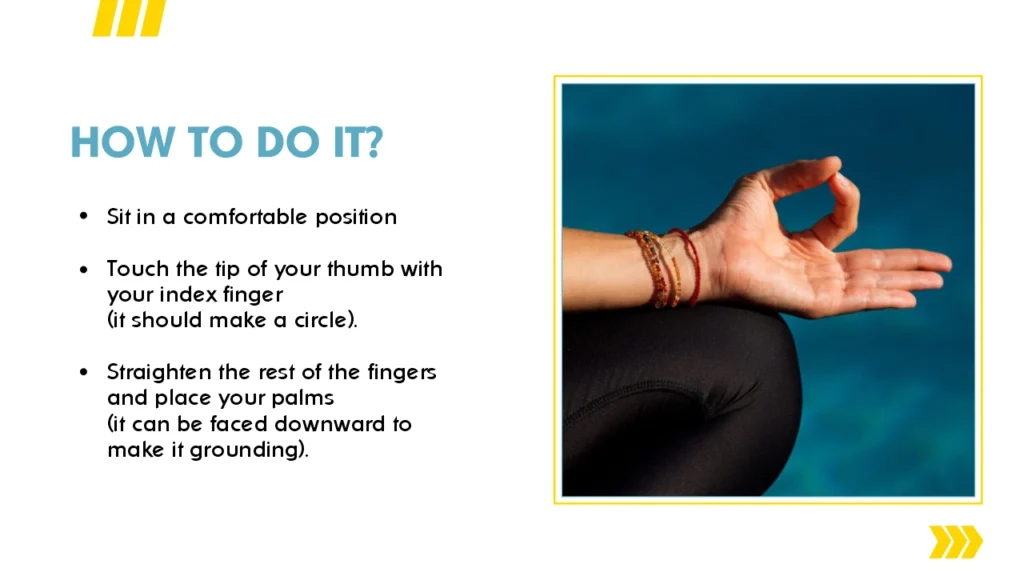
- Sit in a comfortable position
- Touch the tip of your thumb with your index finger (it should make a circle).
- Straighten the rest of the fingers and place your palms (it can be faced downward to make it grounding).
The thumb represents universal consciousness and the index finger is your self-bringing them together represents unity of the inner and outer worlds
Deep Dive into jnana mudra benefits
Increased Focus & Concentration
It establishes a “pranic circuit”, a circulation of life‑force energy within. That assists your brain in remaining more aware and relaxed.
Taming the Mind
Experience more consistent thinking and stop overthinking. After only a few minutes, practitioners report a silent mind space.
Improved Memory
Doing it 15 minutes a day can help the memory more than caffeine (with no crash!).
Anxiety and Stress Relief
This action relieves stress on the mind. It is subtle, but the change is real with time.
Better Sleep
A lot of users claim that they experience reduced night time tossing and turning when they use it prior to sleep.
Spiritual Connection
The gesture reminds of our inner side and universal run. It is based on the jnanayoga meaning, the yoga of knowledge and wisdom
Improved Communication & Peace
According to one of the studies, when hands take this position, peaceful energy just radiates, and interactions become easier
How to Practice for Maximum jnana mudra benefits
When To Do It
Perfect when meditating, studying, in a stressed situation or even before bedtime- 3 times a day shows results
How Long
Novices begin with 5 minutes. Increase slowly to 15-30 minutes to derive maximum benefit.
Optimal Sitting Position
Sukhasana (easy seat), padmasana (lotus), or even a chair, just sit up but relaxed
Breathing Tips
Breathe in and out through your nose slowly. There is no effort to be made, simply observe the breath.
Linking to jnana yoga meaning and what is jnana yoga in hinduism
Jnanayoga is the way of knowledge by employing study, contemplation and intuition in realizing our real nature. In Hinduism, it is one of the four primary yogas. It makes us doubt appearance and withdraw into ourselves to seek reunion with the divine. We manifest that awareness in everyday life through such tools as jnana mudra benefits.
Troubleshooting & Tips
Tired or stiff hands?
Warm up your fingers by bending and straightening them. Then be smooth into the gesture.
Which way do the palms face?
With palms down it is grounding (jnana mudra). Palms up move to receptivity (chin mudra)
Fingers not staying touching?
Instead, beginners can touch the thumb to the center of the index finger, it seems more secure.
Conclusion
There are no specific instruments or long practices required: the jnana mudra advantages are in its simplicity. Even a few minutes a day will give you an opportunity to open a door to clearer thinking, inner peace and greater presence. It connects wonderfully with yoga definition and advantages, and brings you to harmony in mind, body and spirit. And, it connects with the core of jnana yoga meaning. Will you do it now, just as I have suggested, finger tips together, breathe in consciousness, breathe out strain, and discover how this little action can transform your world.
Frequently Asked Questions
Can children practice it?
Yes, it is mild and harmless. It is simple, just touch your finger and thumb, and hold it a few minutes to make you feel calm.
Are there any side effects?
None known. Only avoid it when you have injuries on the wrist or finger.
How is it different from Chin Mudra?
Chin mudra is nearly the same shape, but with palms up – resulting in a greater receptivity. jnana mudra is enhanced by palms down -more grounded and introverted.