
by indigiseo | Mar 4, 2026 | Blog
No Weights? No Problem: 10 Best Forearm Workouts to do Without Equipment
Imagine opening a jar that doesn’t want to budge or carrying many little grocery bags and your arms let go first, not your hands.
Efficient forearms benefit athletes as well as the everyday person. Fortunately, there’s some good news ahead.
You don’t have to go to the gym or use fancy machines to build your muscles.
This guide on forearm workout without equipment, you’ll learn how to enhance your grip and forearm muscles at home with just bodyweight exercises.
Why Focus on Forearms?
Forearms are important for almost all kinds of upper body exercise.
Being strong in the forearms makes everything easier and safer, whether you are typing, lifting or cooking.
A focused forearm workout also helps your arms look more attractive.
Top Forearm Exercises Without Equipment
Let’s delve into exercises that require no equipment but offer maximum benefits.
1. Reverse Hand Push-ups
This variation targets the forearms intensely.
How to Do It:
Assume a kneeling position.
Put your hands onto the floor, with your fingers pointing to your knees.
Extend your legs to plank position.
Lower down with your elbows bent and push up.
This exercise is a staple in forearms exercises for gym routines and is equally effective at home.
2. Wrist Rotations
This exercise will add wrist flexibility and as well as strengthen the forearms.
How to Do It:
Stand with your arms extended in front of you.
Rotate wrists clockwise for 30 seconds.
Repeat counterclockwise.
At best planned into a forearm workout sometime, this can yield significant results.
3. Static Hold Plank
This exercise will recruit all of your forearms and pair core values.
How to Do It:
Assume a forearms plank position..
Create a straight line from head to heels.
Hold for 30-60 seconds.
A fundamental move in any forearm workout without equipment regimen.
4. Knuckle Push-ups
This knuckle push-up will help build strength in your wrists and forearm.
How to Do It:
Assume the push up position and support your weight on your knuckles.
Lower your weight and push-up.
This is often seen in forearms exercises gym settings but can be done anywhere.
5. Arm Scissors
This exercise will help improve venous circulation and the forearm’s endurance.
How to Do It:
Stand up and extend your arms to the sides.
Cross your arms in front of your chest and return.
Repeat rapidly for 30 seconds.
This exercise will fit perfectly into your best home exercise for forearms.
6. Fingertip Plank
This exercise will improve grip strength and increase endurance in fingers.
How to Do It:
Assume a plank position and support your weight on your fingertips.
Hold for as long as you can.
A challenging yet rewarding forearm workout best exercise.
7. Forearm Squeeze
This exercise will sufficiently target your forearm flexors.
How to Do It:
Squeeze a soft object, such as a towel, or tennis ball.
Hold for 5 seconds, then release.
Repeat for 15 reps.
Simple yet potent for your best home exercise for forearms routine.
8. Crab Walk
Engages multiple muscle groups, including forearms.
How to Do It:
Sit on the floor, hands behind you, fingers pointing forward.
Lift your hips and walk forward and backward.
A dynamic move in forearms exercises gym programs, adaptable for home workouts.
9. Isometric Wall Push
Builds static strength in forearms.
How to Do It:
Stand facing a wall, arms extended.
Push against the wall with maximum effort.
Hold for 30 seconds.
Incorporate this into your forearm workout without equipment plan for variety.
10. Cherry Picker
A dynamic movement targeting forearm flexors.
How to Do It:
Stand with feet shoulder-width apart.
Extend arms overhead and mimic picking cherries.
Repeat for 1 minute.
A fun and effective best home exercise for forearms.
Structuring Your Forearm Workout
Maximize your benefits by doing a forearm workout without equipment as below:
- Easy Cardio: Begin by doing a few minutes of light running or circle your arms for 5 minutes.
- Pick several of the exercises listed, do 2 sets of 10-15 repetitions each time.
- After swinging your arms, pause from hitting and stretch your forearms and wrists.
Being regular helps a lot. Train your forearms every 2-3 days, so you get a rest from them in between.
Conclusion
You don’t require any special equipment to build your forearm muscles.
Maintaining your workout routine and these exercises can give you good results at home.
The best way to work your forearms is by doing the same exercise again and again. You’ll immediately notice a positive change in your feelings if you take action now.
FAQ’s
How often should I do forearm workouts?
Physically stimulate your muscles about 2 or 3 times per week and, at least once per week, allow yourself a pause to recover.
Can I do these exercises every day?
Some movements, like turning your wrists, can be done every day, though you shouldn’t forget to rest your muscles
How long will it take to see results?
With consistent effort, you can see the changes in your body in 4-6 weeks.
Will these exercises improve my grip strength?
Yes. Many of the exercises help build your grip which is good for your everyday activities.

by indigiseo | Mar 4, 2026 | Aasan
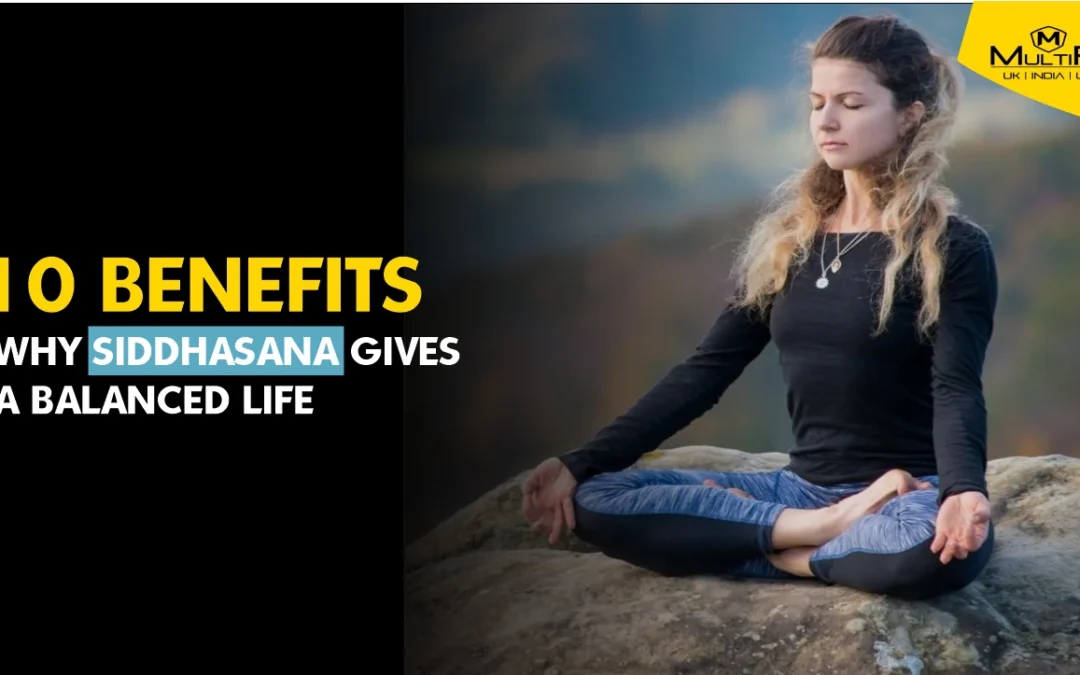
10 Benefits of Siddhasana gives a Balanced Life
In our fast-paced lives, finding moments of peace is essential. Siddhasana, or the Accomplished Pose, offers a path to that serenity.
Siddhasana extends beyond basic leg positioning because it leads people toward earth connection while improving concentration and fostering complete health.
What is Siddhasana?
Sanskrit defines Siddha as an accomplished state while Asana represents posture which becomes Siddhasana – a traditional seated yoga position designed for meditation purposes.
Professionals advocate the meditation pose for people who want to advance their meditation skills due to its stability benefits.
For beginners Siddhasana exists in a simpler form named Ardha Siddhasana since beginners along with people who experience flexibility constraints can practice it.
How to Do Siddhasana Step by Step
- Choose a Floor Position by Sitting with Legs Extended Forward While Using a mat or cushion for Additional Comfort.
- A yoga mat or cushion should be used to increase comfort during the exercise.
- Bend the knee of your left leg to bring your heel toward your perineum.
- Place the right knee bent to rest the heel next to the left ankle while it lines up with the pubic bone.
- Curl both knees towards the floor without straining at the point where the ankles are tucking comfortably.
- You should hold your hands on your knees while facing the palms either upward or using selected hand positions.
- Position yourself with your back straightened and your shoulders without tension while maintaining forward gaze or keeping your eyes shut.
- Breathing deeply allows maintenance of the posture position for a short period.
10 Benefits of Siddhasana
- Siddhasana practice maintains body posture through its regular practice which minimizes spinal and neck stress.
- Regular practice of Siddhasana helps improve flexibility through its effects on stretching the hips and knees and ankles.
- The contact of Siddhasana on the abdomen stimulates digestive organs and relieves symptoms of bloating.
- This meditation pose helps both mental and emotional relaxation because breathing and posture become primary areas of focus.
- Through this pose practitioners enable their bodies to balance their energy flow thus improving their vitality.
- The pelvic area receives stimulation through this position that may create beneficial effects for the reproductive organs.
- Siddhasana provides stability by practicing meditation because of its solid position.
- A consistent practice of this posture leads to better concentration capabilities.
- The relaxed posture allows people to decrease their physical and mental fatigue.
- Siddhasana stands as an important posture for spiritual development along with inner peace experiences.
Siddhasana vs. Ardha Siddhasana
The complete Siddhasana requires both heels to rest on the perineum yet Ardha Siddhasana features one active heel next to the perineum with the other foot under the opposing thigh.
Beginners with restricted flexibility as well as individuals with limited strength can perform this modified version of Siddhasana to acquire comparable benefits without experiencing high levels of discomfort.
Precautions and Tips
Avoid if Injured: Individuals with knee, ankle, or hip injuries should refrain from this pose.
Use Props: Beginners can use cushions or folded blankets under the hips for added support.
Alternate Legs: Regularly switch the crossing of legs to maintain balance in the body.
Consult a Professional: If unsure about the posture or experiencing discomfort, seek guidance from a certified yoga instructor.
Conclusion
Siddhasana practice in daily life brings significant changes to your health. Siddhasana develops your mind to become clear and stretches your body while helping your spirit grow stronger.
You should dedicate a short time to this practice during your first days before acknowledging the major changes it produces in mental and physical states.
by indigiseo | Mar 3, 2026 | Blog
10 Benefits of Siddhasana gives a Balanced Life
In our fast-paced lives, finding moments of peace is essential. Siddhasana, or the Accomplished Pose, offers a path to that serenity.
Siddhasana extends beyond basic leg positioning because it leads people toward earth connection while improving concentration and fostering complete health.
What is Siddhasana?
Sanskrit defines Siddha as an accomplished state while Asana represents posture which becomes Siddhasana – a traditional seated yoga position designed for meditation purposes.
Professionals advocate the meditation pose for people who want to advance their meditation skills due to its stability benefits.
For beginners Siddhasana exists in a simpler form named Ardha Siddhasana since beginners along with people who experience flexibility constraints can practice it.
How to Do Siddhasana Step by Step
- Choose a Floor Position by Sitting with Legs Extended Forward While Using a mat or cushion for Additional Comfort.
- A yoga mat or cushion should be used to increase comfort during the exercise.
- Bend the knee of your left leg to bring your heel toward your perineum.
- Place the right knee bent to rest the heel next to the left ankle while it lines up with the pubic bone.
- Curl both knees towards the floor without straining at the point where the ankles are tucking comfortably.
- You should hold your hands on your knees while facing the palms either upward or using selected hand positions.
- Position yourself with your back straightened and your shoulders without tension while maintaining forward gaze or keeping your eyes shut.
- Breathing deeply allows maintenance of the posture position for a short period.
10 Benefits of Siddhasana
- Siddhasana practice maintains body posture through its regular practice which minimizes spinal and neck stress.
- Regular practice of Siddhasana helps improve flexibility through its effects on stretching the hips and knees and ankles.
- The contact of Siddhasana on the abdomen stimulates digestive organs and relieves symptoms of bloating.
- This meditation pose helps both mental and emotional relaxation because breathing and posture become primary areas of focus.
- Through this pose practitioners enable their bodies to balance their energy flow thus improving their vitality.
- The pelvic area receives stimulation through this position that may create beneficial effects for the reproductive organs.
- Siddhasana provides stability by practicing meditation because of its solid position.
- A consistent practice of this posture leads to better concentration capabilities.
- The relaxed posture allows people to decrease their physical and mental fatigue.
- Siddhasana stands as an important posture for spiritual development along with inner peace experiences.
Siddhasana vs. Ardha Siddhasana
The complete Siddhasana requires both heels to rest on the perineum yet Ardha Siddhasana features one active heel next to the perineum with the other foot under the opposing thigh.
Beginners with restricted flexibility as well as individuals with limited strength can perform this modified version of Siddhasana to acquire comparable benefits without experiencing high levels of discomfort.
Precautions and Tips
Avoid if Injured: Individuals with knee, ankle, or hip injuries should refrain from this pose.
Use Props: Beginners can use cushions or folded blankets under the hips for added support.
Alternate Legs: Regularly switch the crossing of legs to maintain balance in the body.
Consult a Professional: If unsure about the posture or experiencing discomfort, seek guidance from a certified yoga instructor.
Conclusion
Siddhasana practice in daily life brings significant changes to your health. Siddhasana develops your mind to become clear and stretches your body while helping your spirit grow stronger.
You should dedicate a short time to this practice during your first days before acknowledging the major changes it produces in mental and physical states.
FAQ’s
What is the meaning of Siddhasana?
Siddhasana serves as the “accomplished posture” in Sanskrit which helps practitioners develop both spiritual and physical balance.
How does Siddhasana benefit meditation?
Through Siddhasana practitioners receive stability and alignment benefits which support their ability to meditate without physical interruptions.
Can beginners practice Siddhasana?
New practitioners should begin with Ardha Siddhasana until they develop enough flexibility to progress to the complete variation.
How long should one hold Siddhasana?
The practice should begin with short sessions and extend the time length when comfort levels and physical endurance steadily improve.
Is Siddhasana suitable for everyone?
People holding special injuries need a healthcare examination before they engage in this exercise.
by indigiseo | Mar 1, 2026 | Aasan
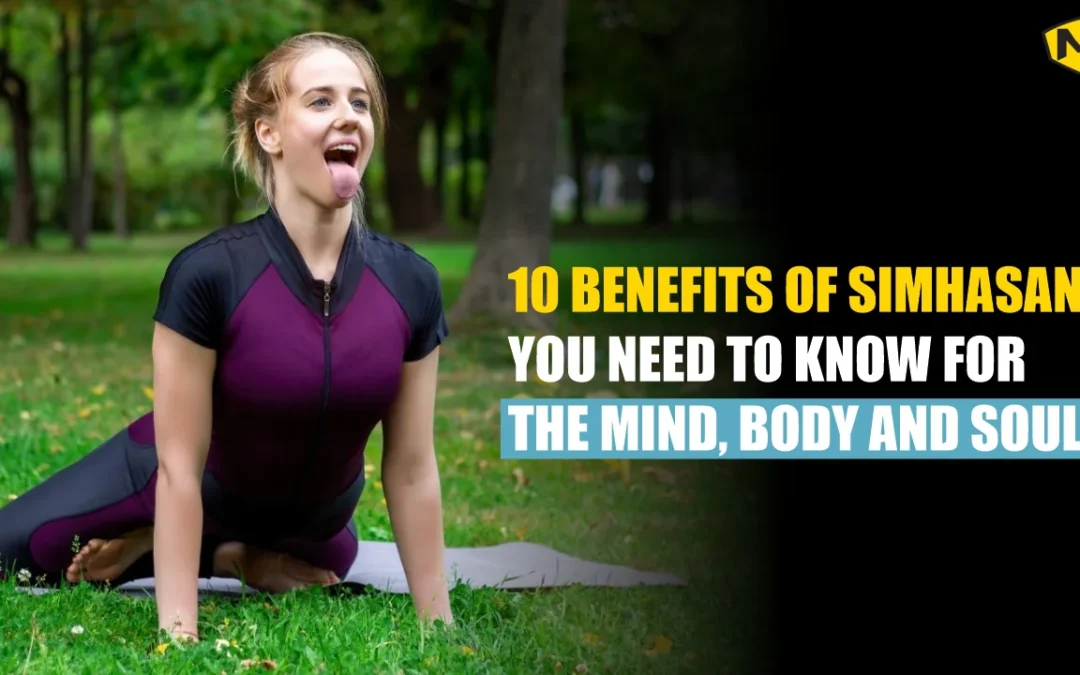
10 Benefits of Simhasana You Need to Know for the Mind, Body and Soul
Have you ever asked yourself why your jaw is tight after a long meeting or your voice is stuck when you are nervous?
I felt the same way like you did, until I found simhasana.
It is an easy yoga pose, which can release tension on our face, relieve our breathing, and make us feel more confident, and this can take only several minutes a day.
Want to know more how this single pose can lead to a sharp difference? Reading on, you will find all the necessary steps, pointers, and hidden benefits of the simhasana in detail.
What is Simhasana Yoga?
Simha is the Sanskrit meaning of lion and asana is the Sanskrit meaning of posture.
Hence, it is literally lion posture yoga.
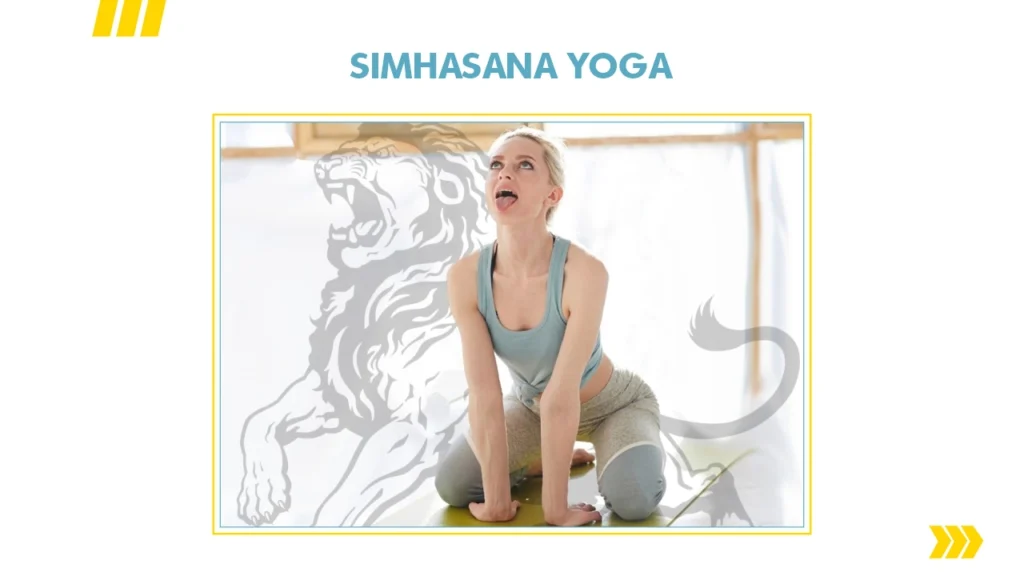
You kneel, rest on your heels, put your hands on your knees, wide open mouth, tongue out, face forward, or up, and breathe loudly–like a roar of the lion.
It is sort of a short face-and-spine stretch-stretch combined with a press-release of your stress. It is simple to figure out and pleasant to train even to those with little experience. You can also combine with Vajarasana and Padmasana to this pose for more stretch and flexibility.
Benefits of Simhasana
1. Relaxes facial and throat muscle tension
When we make a truly “wide-mouth, wide-open” roar, we engage the throat muscles as well as the muscles of the face, savoring a release of the tightness in the jaw, closed cheeks, and neck tension that we often feel after too much time in front of a screen.
2.Enhances vocal clarity
Stretching out the muscles of the throat can help support the articulation and projection of the voice much like yoga for singers, presenters, educators, etc.
3.Improves posture, spinal and upper torso stretch
The forward lean opens the chest area and supports the alignment of your spine. Great after leaning forward over your device.
4.Releases tension in the low back
This pose helps you strengthen spinal alignment and relax tightly contracted musculature in the low back, especially nice relief after long periods of sitting.
5.Calms the nervous system
This large exhalation clears out carbon dioxide and restores the heart rate and breath rhythm.
6.Stimulates throat (and maybe thyroid)
The pose compresses, stretches, and engages the throat to improve circulation in the area, often mentioned in articles on vocal health and entire body types are advised for thyroid health.
7.Improves mood and certainty
It might be a little silly at first, but it will help to clear your self-consciousness and get your energy moving.
8.Provides circulation support to the face
The face engagement helps with blood flow to the skin—supporting healthy skin and glow.
9.Aids digestion
The gentle forward movement of the torso massages the belly, sometimes connected to improved digestion and gut-peristalsis.
10.Eases stress and anxiety
That deliberate “haa” is a release of breath when we usually have expelled pent-up emotional stress, a calming and balancing effect for our thinking.
Simhasana Steps
Here’s a clear, quick guide on how to do simhasana step by step:
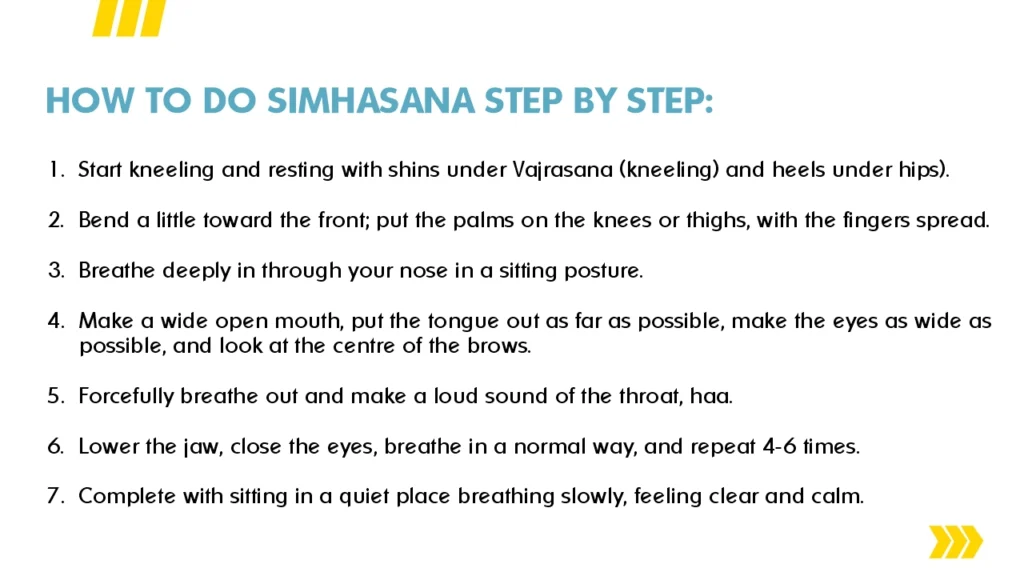
- Start kneeling and resting with shins under Vajrasana (kneeling) and heels under hips).
- Bend a little toward the front; put the palms on the knees or thighs, with the fingers spread.
- Breathe deeply in through your nose in a sitting posture.
- Make a wide open mouth, put the tongue out as far as possible, make the eyes as wide as possible, and look at the centre of the brows.
- Forcefully breathe out and make a loud sound of the throat, haa.
- lower the jaw, close the eyes, breathe in a normal way, and repeat 4-6 times.
- Complete with sitting in a quiet place breathing slowly, feeling clear and calm.
All of those steps have their own bonus: posture, control of breathing, emotional discharge so that you feel it from head to toe.
When & How Often to Practice
Morning wake-up: Do 4–6 rounds to energize your face, throat, and mind.
Midday reset: Try it before calls or presentations to calm nerves and boost confidence.
Evening unwind: Use 2–3 rounds to ease tension after a day of sitting or screen time.
There’s no need to hold more than a minute per round. Just a few minutes a day gives noticeable benefits.
Tips & Precautions
Keep it gentle, don’t force your tongue or open your jaw too wide.
Use cushions if kneeling hurts.
Avoid it if you have jaw pain, neck injury, uncontrolled high blood pressure, or recent eye surgery.
Skip post-meal; do it on an empty belly.
Stop if light‑headed; return to calm breathing.
Conclusion
But, in case you are seeking a faster, simpler way of feeling good both emotionally, physically and mentally, then you should attempt the benefits of simhasana everyday.
It provides relief on the posture, supports the voice, relieves on body stress and elevates mood. You can do it without special equipment or requiring hours and hours of time.
Only several roars are needed to wake you up and calm you down to become stronger. Wait a second (give your inner lion a moment) and see how a simple lion posture yoga can make you look and feel like the best and brightest version of yourself.
FAQ’s
What are simhasana steps and benefits for vocal training?
The roar eases out vocal chords and strains throat muscles. It makes you feel you can breathe more freely, assisting in making speech more clear and audible to any speaker or singer.
How does lion posture yoga help with stress?
CO2 breath causes the exhalation to slow down the heart and the breath. It is a stress reliever and it is inbuilt.
Who should avoid it?
Check with a physician first if you have TMJ problems, large thyroid nodules, uncontrolled high blood pressure, neck/back injuries, or you have had surgery on the area around the eyes..
How long should I hold each roar?
Normally until you have exhaled fully–approximately 3 -5 seconds. Then breathe in and repeat again. Duration of practice: less than 2 minutes is enough.
Does it help digestion?
The forward shift activates the shrinking of the belly with gentle massage which can also activate bowel movement: lots of people feel it relieves bloating and slow bowel movements.

by indigiseo | Mar 1, 2026 | Health
Best Healthy Diet Plan to Lose Weight
Losing weight doesn’t have to be hard. By creating a proper diet plan, your fitness journey can be enjoyable and rewarding.
But how would you exactly be able to understand what to eat and what to avoid?
Fear not! In this article, we got you covered with the best healthy diet plan to lose weight.
Why a Healthy Diet Plan is Essential
Before diving in, we should understand why having a diet plan is necessary. A good, balanced diet provides your body with the essential nutrients, vitamins, and minerals it needs to function efficiently.
By having it right, you boost your metabolism, increase your energy levels, and naturally support weight loss.
Your 7-Day Weight Loss Diet Plan
Ready to get started? Here’s a sample 7-day diet plan for weight loss while enjoying delicious and nutritious meals.
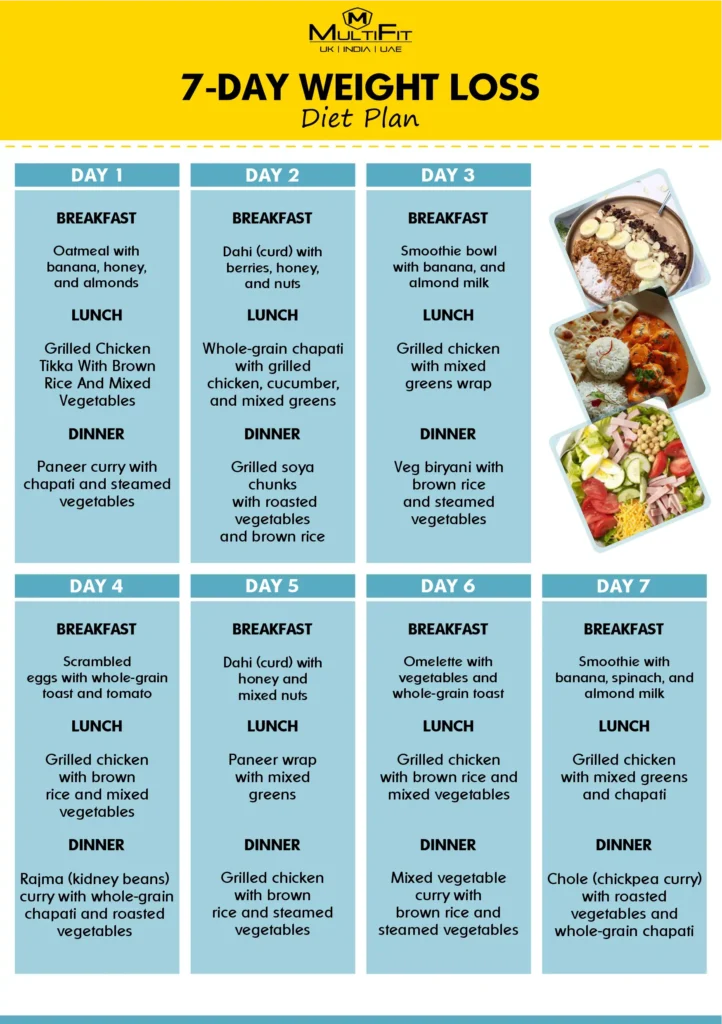
7-Day Diet Plan for Weight Loss
Day 1:
Breakfast: Oatmeal with banana, honey, and almonds
Lunch: Grilled chicken tikka with brown rice and mixed vegetables
Dinner: Paneer curry with chapati and steamed vegetables
Day 2:
Breakfast: Dahi (curd) with berries, honey, and nuts
Lunch: Whole-grain chapati with grilled chicken, cucumber, and mixed greens
Dinner: Grilled soya chunks with roasted vegetables and brown rice
Day 3:
Breakfast: Smoothie bowl with banana, and almond milk
Lunch: Grilled chicken with mixed greens wrap
Dinner: Veg biryani with brown rice and steamed vegetables
Day 4:
Breakfast: Scrambled eggs with whole-grain toast and tomato
Lunch: Grilled chicken with brown rice and mixed vegetables
Dinner: Rajma (kidney beans) curry with whole-grain chapati and roasted vegetables
Day 5:
Breakfast: Dahi (curd) with honey and mixed nuts
Lunch: Paneer wrap with mixed greens
Dinner: Grilled chicken with brown rice and steamed vegetables
Day 6:
Breakfast: Omelette with vegetables and whole-grain toast
Lunch: Grilled chicken with brown rice and mixed vegetables
Dinner: Mixed vegetable curry with brown rice and steamed vegetables
Day 7:
Breakfast: Smoothie with banana, spinach, and almond milk
Lunch: Grilled chicken with mixed greens and chapati
Dinner: Chole (chickpea curry) with roasted vegetables and whole-grain chapati
Nutrition Basics for Weight Loss
A balanced nutrition diet plan to lose weight should include:
Proteins: Lean sources like chicken, soya chunks, paneer, and dal.
Healthy Fats: Nuts, seeds, and dahi (curd).
Carbohydrates: Brown rice, chapati, and bread.
Lose Weight Food Chart
Here’s a handy lose-weight food chart with affordable food options:
Fruits: Apples, bananas, mangoes
Vegetables: Broccoli, spinach, bell peppers
Protein: Chicken, paneer, soya chunks, dal
Healthy Fats: Nuts, seeds, dahi (curd)
Complex Carbohydrates: Brown rice, chapati, bread
(Disclaimer: The diet plan provided is tailored to individual needs and may vary based on specific requirements. Individuals with medical conditions should consult their doctor before following the diet plan.)
Conclusion
Come out of procrastination and fight against the fear of weight gain. Follow a well-prepared diet plan and that will turn your whole lifestyle. By going through and understanding our best healthy diet plan to lose weight, with a detailed diet table for weight loss and a 7-day diet plan for weight loss, achieve your weight loss goals and maintain overall health and well-being.
Ready to transform your health journey? Join MultiFit today and get personalized nutrition and training plans to help you achieve your weight loss goals!