by indigiseo | Mar 5, 2026 | Aasan
The World of Yoga Mudrasana: A Step by Step Guide, Benefits and More
There are times when it seems like life is spinning us around in an endless circle, and we have no time to stop and think about how we’re doing.That’s where the ancient practice of Yoga Mudrasana comes in.
This transformative pose is well- known in balancing the mind, body, and soul. If you’ve wondering about the benefits of yoga mudrasana or how it fits into your practice, you’re in the right place.
Let’s understand this powerful pose together.
What is Yoga Mudrasna?
It is also known as the Psychic Union Pose, which is a seated forward-bending posture.
“Mudra” means “Seal” in Sanskrit, and “Asana” means “Posture”. Together, these words form the word Mudrasana. This is seen as a symbol that represents a “seal of awareness”.
It is said, it’s also an anti-aging asana. This yoga pose helps people keep their young appearance and delay wrinkles.
Benefits of Yoga Mudrasana
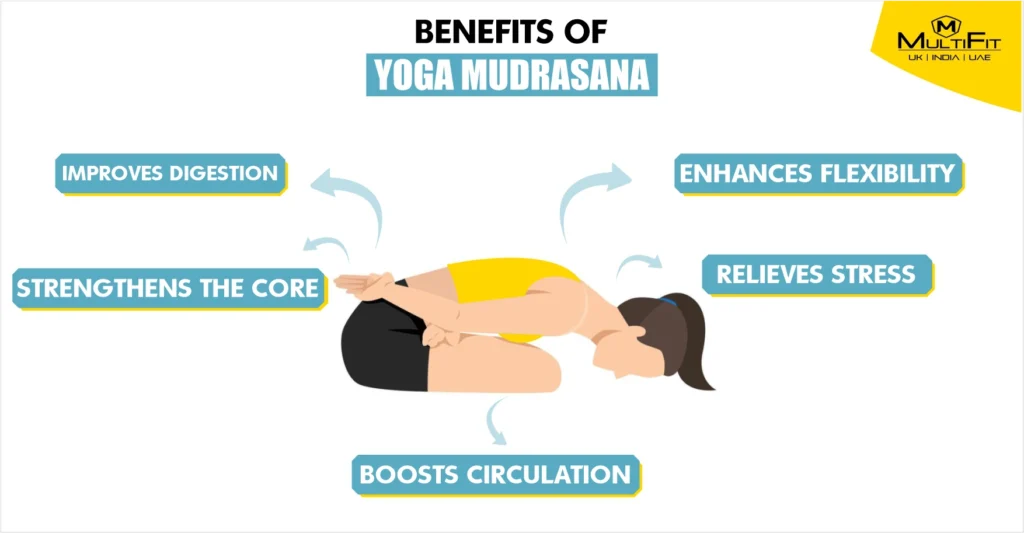
- Improves Digestion: It helps to stimulate the digestive organs which helps in metabolism and ease issues like bloating or constipation.
- Enhances Flexibility: This pose stretches the spine, shoulders, and hips, which increases your flexibility over time.
- Relieves Stress: While doing this pose you become relaxed and calm. It’s a great way to release tension after a long day.
- Strengthens the Core: You build core strength because in this pose your abdomen is being engaged.
- Boosts Circulation: The forward-bending movement increases blood flow to the head and upper body, revitalizing your system.
- Supports Mental Clarity: Practicing this pose encourages mindfulness, helping you feel more centered and focused.
How to Practice Mudrasana Yoga
– Sit on the floor in a cross-legged position. Padmasana (Lotus Pose) is ideal, but you can modify it to suit your flexibility.
– Place your hands behind your back and clasp them together, interlocking your fingers.
– Inhale deeply, elongating your spine.
– As you exhale, slowly bend forward, bringing your forehead towards the floor. Move gently and stop where you feel comfortable.
– Hold the position for 10-30 seconds, focusing on your breath.
– Inhale as you slowly rise back to the starting position. Release your hands and relax.
Yoga Mudrasana Benefits for Beginners
If you’re new to this pose, don’t worry about touching the floor immediately.
Even practicing a partial forward fold can provide benefits. Use a cushion or yoga block to support your head and make the pose more accessible.
Final Thoughts
Yoga Mudrasana is a simple way to reconnect with yourself. It helps you find calm, clarity, and balance.
By practicing this pose, you take a moment to pause, breathe, and embrace the present. As you include it in your routine, remember it’s not about perfection but connection.
Every practice is a step toward feeling more grounded and aware. Try it, and see how this pose can bring a sense of peace and strength into your day.
FAQ’s
Is Yoga Mudrasana suitable for everyone?
It’s best for those with moderate flexibility. If you have back pain, hip issues, or knee problems, consult with a yoga instructor before trying it.
Can Mudrasana Yoga help with stress relief?
Absolutely. The pose encourages deep breathing and relaxation, which are key to reducing stress.
How often should I practice the Yoga Mudrasana pose?
You can include it in your daily routine or practice it 3-4 times a week, depending on your comfort level and goals.
What’s the difference between Yoga Mudrasana and other forward bends?
Yoga Mudrasana combines a meditative focus with the physical benefits of a forward bend, making it a holistic pose for both body and mind.
by indigiseo | Mar 5, 2026 | Yoga
The 7 Types of Pranayama and 10 Powerful Benefits You Should Know
I used to run around, by attending meetings and doing chores and there’s this moment of breathlessness, as if I’d done a major deal.
My mentor gave me advice on a yoga pose.
Within a couple of minutes there was this stillness that descended upon me; as though one pressed a pause key to my thinking machine. This slight modification made me more conscious, attentive, and alert.
So, I would like to share this experience on pranayama, the types of pranayama which transformed my life and about the pranayama yoga advantages.
Perhaps, you are not flowing smoothly with stress or rattle; read and explore how a simple breathing technique can help you.
What is Pranayama?
Pranayama is a yoga breathing exercise that uses a controlled breathing practice.
The term is of Sanskrit origin or rather ‘prana’ translates to ‘life force or energy’ in Sanskrit and ‘ayama’ translates to ‘extend or regulate’.
Therefore, pranayama is literally translated as a way to control or expand the life energy via breathing.
It is among the eight limbs of yoga and it is also practiced to enhance health, mind and emotion.
Pranayama through the control of the breath helps to relax the nervous system, lowers stress as well as enhances well-being. It is the connector between the mind and body.
The Different Kinds of Pranayama
Here are seven essential types of pranayama, each with clear steps and benefits:
• Anulom Vilom (Alternate-nostril)
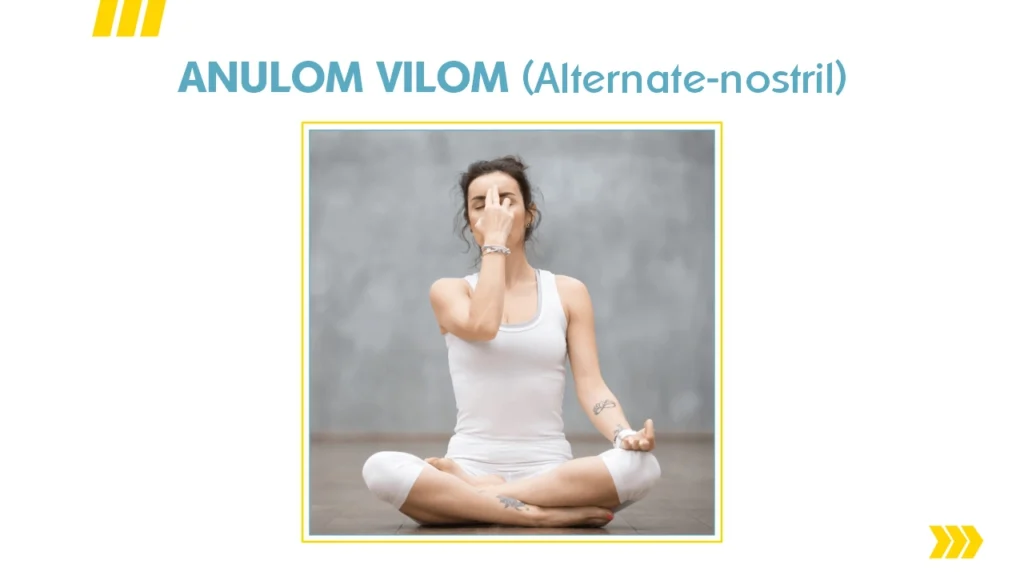
- Close the right nostril, and inhale fully through the left nostril.
- Pause briefly.
- Close the left nostril, and exhale through the right nostril.
- Reverse the directions.
Reason: Calms stress, clears sinuses, and helps with concentration.
• Bhastrika (Bellows breath)

- Force-inhale and force-exhale through your nose, with a rapid tempo.
- Do as many rounds of 10-20 breaths as you feel comfortable.
Reason: Boosts oxygenation, invigorates, strengthens lungs.
• Bhramari (Bee breath)
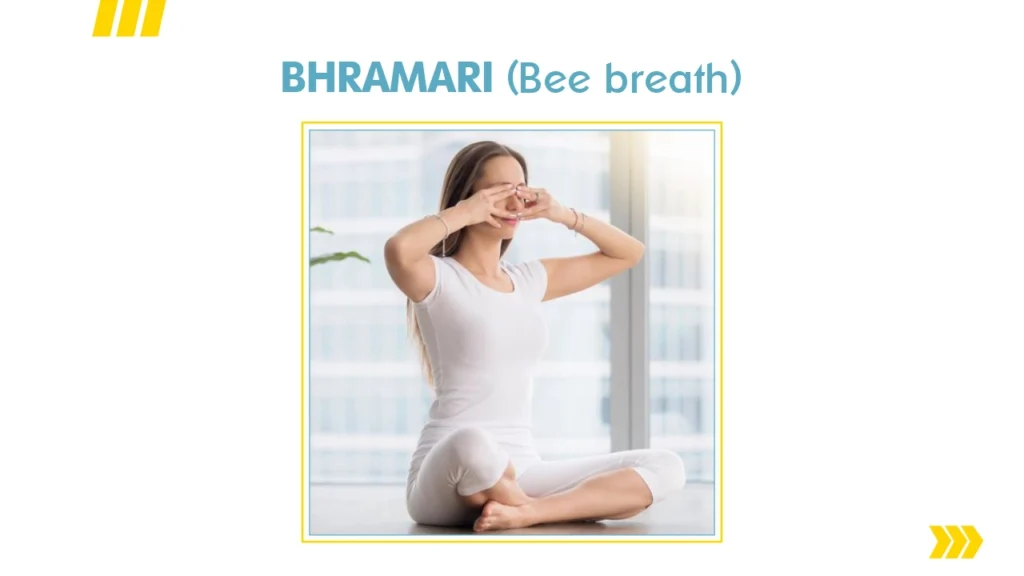
- Inhale, then exhale while making an “aaaahhhhhh” sound, similar to a bee.
- Do this 5-10 times.
Reason: Releases stress, calms feelings of anxiety, and assists in restful sleep.
• Sheetali / Sheetkari (Cooling breaths)
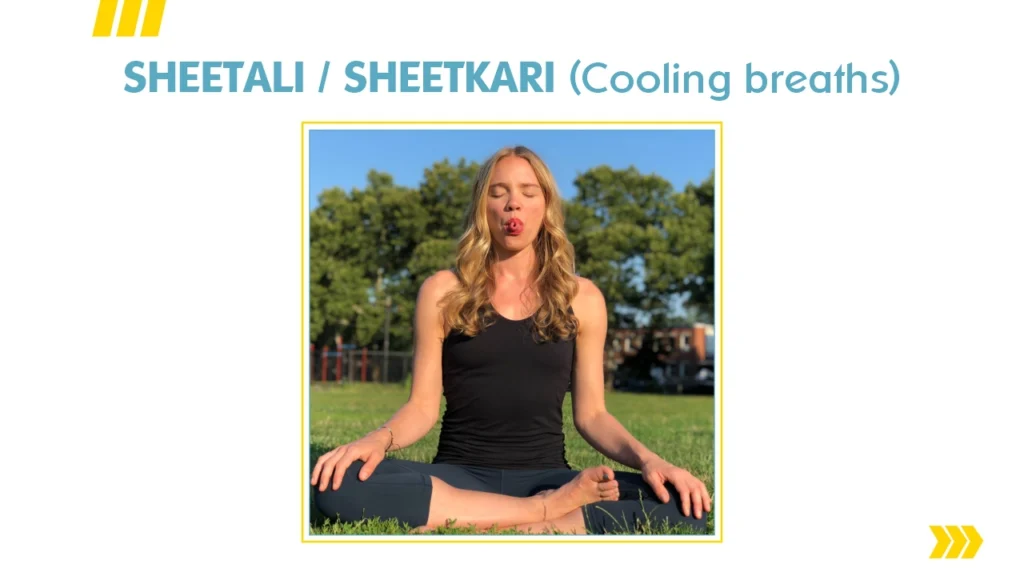
- Either roll your tongue or purse your lips, and inhale the cool air.
- Exhale through your nose.
Reason: Cools the body, promotes concentration, and decreases blood pressure.
• Kapalabhati (Light Skull breath)
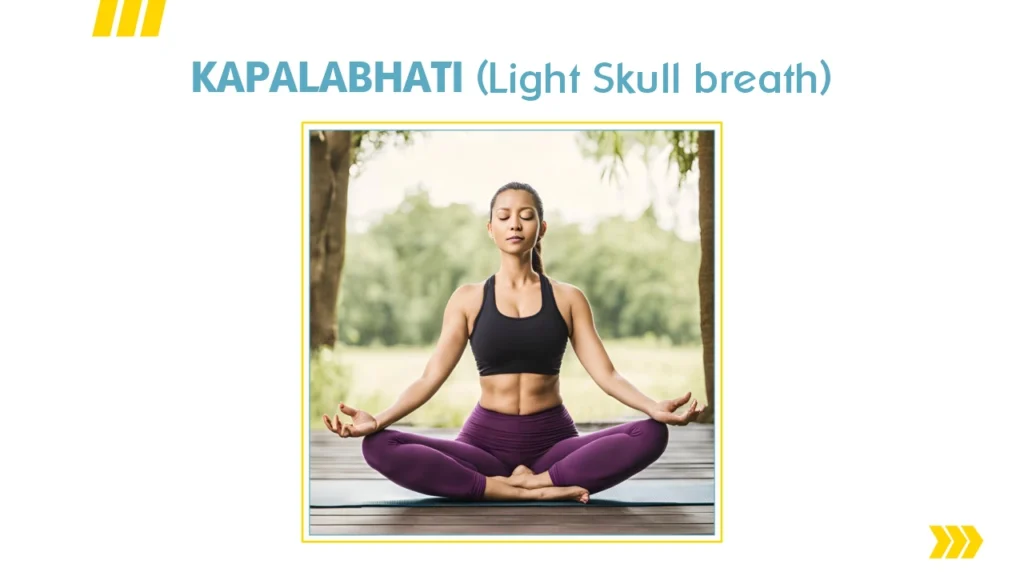
- Short, sharp exhales, passive inhales.
- Fast tempo, core engaged.
Reason: Clears sinuses, improves digestion, and sharpens the mind.
• Ujjayi (Victorious breath)
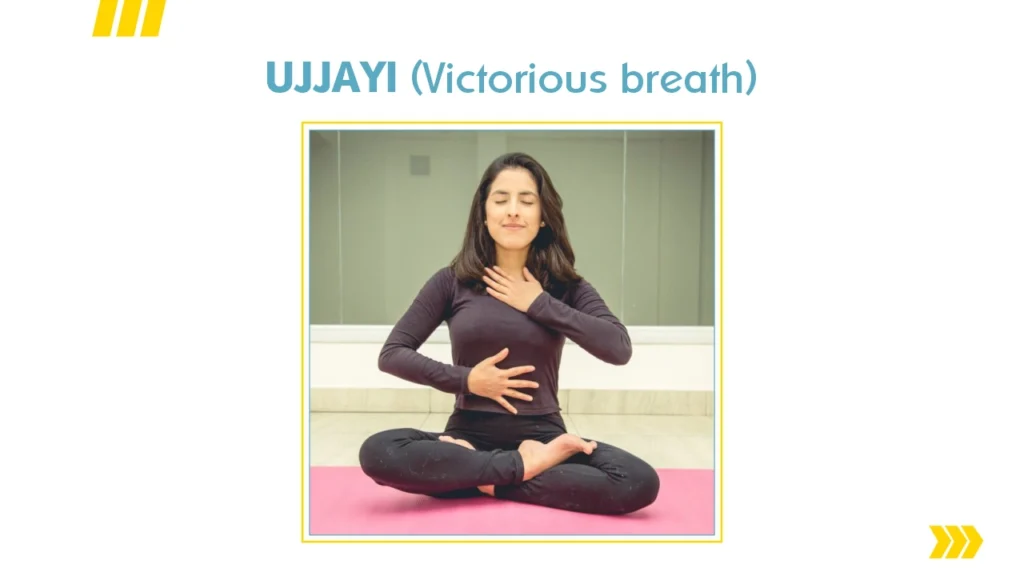
- Inhale/exhale through a slightly constricted throat, and create an ocean sound.
- Usually linked to practice movement, and is common during yoga.
Reason: Calms the nervous system, helps concentration, and links breath with movement.
• Dirga (Three-part breath)
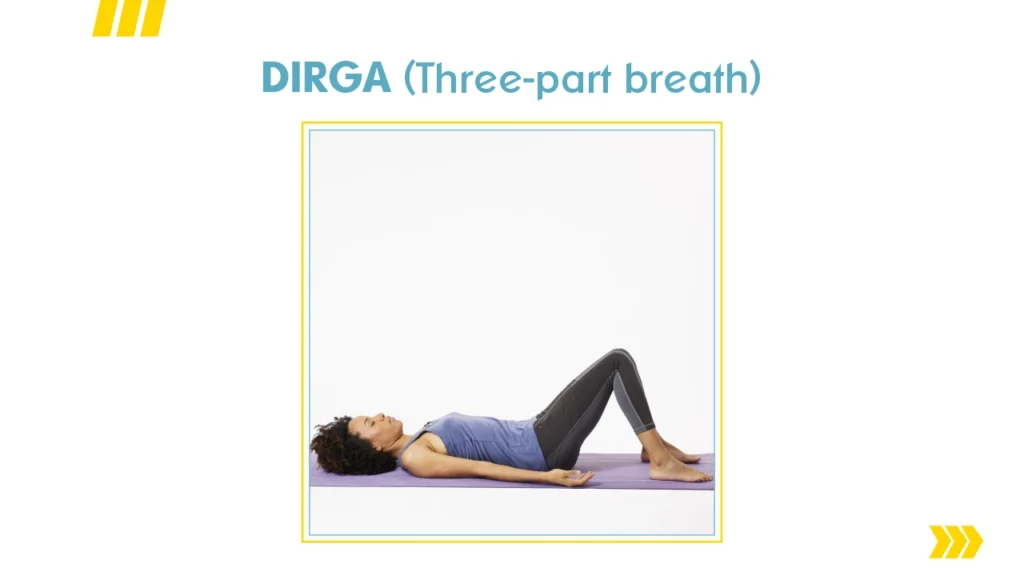
- Fill your stomach, rib cage, and chest, then exhale from your chest to your stomach.
- Continue for several breaths.
Reason: Can be easier for beginners, builds lung awareness and helps with relaxation.
What are the 10 benefits of pranayama?
The benefits can be categorized scientifically and experientially which are:
1.Reducing stress: Switches on the relaxation response, calms heart rate and relaxes mental chaos
2.Improving lung function: Increases lung capacity and improves lung function and capacity
3.Reducing blood pressure: Switches on the relaxation response, opens blood vessels
4.Builds mindful awareness: Keeps us grounded in the present while bringing awareness to our bodies
5.Improving sleep: Calms insomnia/sleep issues down
6.Reducing anxiety: Clamps down on racing thoughts, elevates mood
7.Helpful in quitting smoking: Eases cravings through mindful breathing
8.Helpful in clearing airways: Excellent for asthma and sinus stuff
9.Easing digestion: Stimulates the parasympathetic system.
10.Enhancing focused concentration: Elevates clarity of mind and focus.
So, Try this short practice:
1.Settle down in a calm spot, spine straight.
2.Dirga: 5 deep cycles.
3.Anulom Vilom: 5 rounds.
4.Bhramari: 5 cycles.
5.(Optional) Sheetali: 5 cycles.
This mix covers calming, cooling, and clearing, giving a full-scope taste of these types of pranayama.
What types of advantages of pranayama yoga do you get?
Available: No equipment required, can be done at any time anywhere.
Holistic: Their effect is combined, on mind and body.
Flexible: Do things at your own pace, begin at a slow pace, and then gradually increase speed.
Research-backed: Researches like the National Library of Medicine and International Journal of Research in Medical Sciences show pranayama yoga supports stress relief, lung health, and improvement of focus.
Conclusion
The day when you are feeling scatterbrained or fatigued, just a few minutes of this type of pranayama can rest your mind and body.
I have witnessed the power of breath to soften the tension, raise the energy, and crystalize the thought and all of that without equipment and special room.
The breath will be your guideline. It is a friendship which is cultivated with every time you stop and breathe with purpose.
FAQ’s
How often should I practice?
Most ideal is daily. Begin by getting 510 minutes per week and building by weeks.
Can children do these?
Well, yes, but not breath retention ones such as Anulom Vilom; they ought to practice simple ones.
When shouldn’t I do it?
Avoid when pregnant, when He has heart problems, high blood pressure, or serious respiratory disease consult a physician.
Can pranayama help mental health?
Yes, It helps anxiety and psychosomatic problems as research indicates that it actually reduces the tone of the nervous system.
by indigiseo | Mar 5, 2026 | Exercises
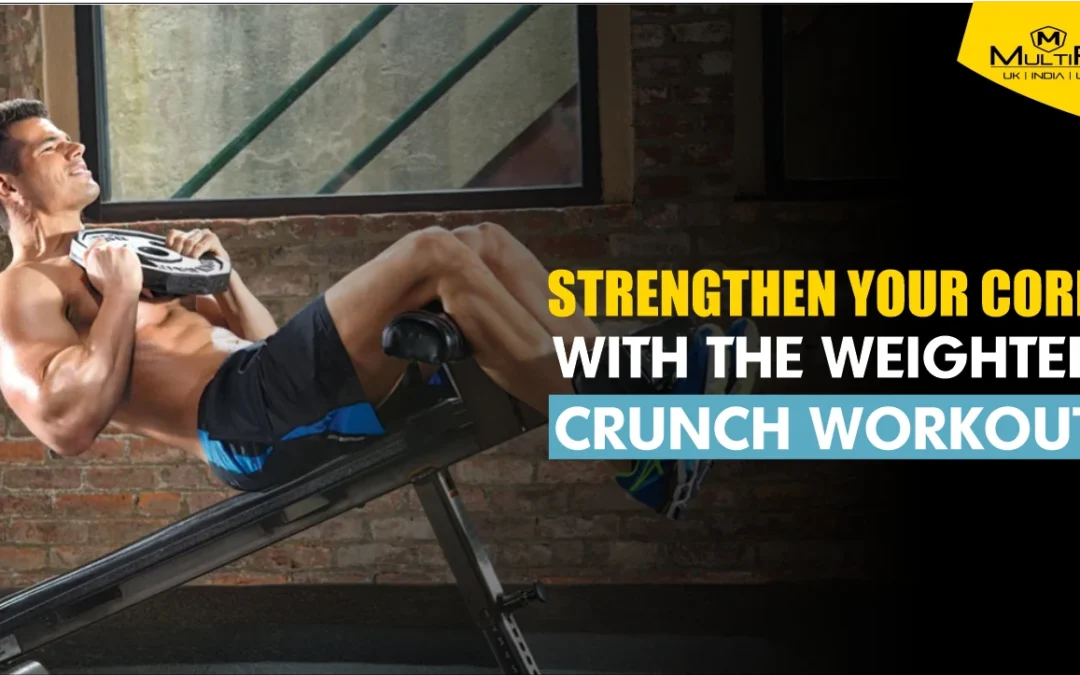
Strengthen Your Core with the Weighted Crunch Workout
Among many people there exists a common problem where traditional crunches have stopped producing results.
You’re not alone. The majority of people struggle to progress their bodyweight exercise routine.
The weighted crunch workout appears as a solution for resistance training. Resistance training enhances your core muscle challenge which results in improved strength and better definition.
Weights used during crunch exercises create important changes in both your stomach definition and core strength.
What Is a Weighted Crunch?
The weighted crunch is a more advanced version of the basic crunch.
The exercise involves adding external resistance like weight plates or dumbbells to increase the intensity.
Applying resistance to the exercise requires your abdominal muscles to work at higher intensity to maximize activation and growth.
How to Do Weighted Crunches
The correct execution of weighted crunches produces maximum benefits while avoiding injuries during performance.
Here’s a step-by-step guide:
- The starting position should consist of lying on your back with legs bent while keeping your feet pressed flat against the floor.
- Grasp a weight either against your chest or behind your head during the exercise.
- Before starting your movement, contract your abdominal muscles to activate them for the exercise.
- Bend your shoulders and upper back upward very slowly as you maintain contact between your lower back and the floor.
- Hold this position at the peak movement while squeezing your stomach muscles.
- Control the descent of your upper body from the maximum height position back to the starting position.
Tips:
Avoid pulling on your neck or using momentum.
Start with a manageable weight to ensure proper form.
Focus on quality over quantity.
Benefits of Weighted Crunches
An exercise program which includes weighted crunches provides multiple benefits.
Using extra weight in this exercise intensifies muscle activation that results in enhanced abdominal strength together with better definition of the muscle groups.
Before performing weighted crunches you must develop core stability because this strengthens your posture and balance for better injury prevention.
Weighted crunches enable progressive overload that stands as the fundamental principle for strengthening muscles and making them grow.
The boosting of workout intensity permits users to finalize more repetitions within shorter periods when conducting bodyweight crunches.
Do Weighted Crunches Work Lower Abs?
Located along the front of your abdomen lies the rectus abdominis which People also name as the “six-pack” muscle.
Although only a single muscle the specific workouts activate various regions of this muscle group.
Weighted crunches deliver their main effects to the superior extent of the rectus abdominis. Reverse crunches together with leg raises provide better lower abdominal activation compared to other exercises.
How Many Weighted Crunches Should I Do?
You should decide your repetition numbers and set count based on your fitness targets.
- For Strength: 2–4 sets of 8–12 reps with moderate to heavy weight.
- For Endurance: 2–3 sets of 15–20 reps with lighter weight.
- For Hypertrophy (Muscle Growth): 3–4 sets of 10–15 reps with challenging weight.
Keep your body position correct during the exercise while modifying your weights to match your exercise level.
Variations of Weighted Crunches
To keep your workouts engaging and target different muscle groups, try these variations:
- Incline Weighted Crunches: Perform crunches on an incline bench to increase the range of motion and intensity.
- Decline Weighted Crunches: Using a decline bench emphasizes the lower portion of the abs.
- Cable Crunches: Utilize a cable machine for constant tension throughout the movement.
- Weighted Bicycle Crunches: Combine rotational movement with resistance to engage obliques.
Safety Considerations
While weighted crunches are effective, it’s essential to approach them with caution:
Avoid Overloading: Using excessively heavy weights can compromise form and increase injury risk.
Listen to Your Body: If you experience discomfort or pain, stop immediately and consult a fitness professional.
Warm-Up Properly: Engage in a brief warm-up to prepare your muscles and joints for the workout.
Consult a Professional: If you’re new to weighted exercises or have existing health conditions, seek guidance from a certified trainer or healthcare provider.
Conclusion
The weighted crunch workout added to your exercise program will boost core strength along with posture while reducing physical challenges that occur due to prolonged sitting.
These three topics cover how to do the weighted crunch, the proper technique of how many weighted crunches should I do, alongside knowing what is a weighted crunch, thus enabling full control of your abdominal training development.
Paying attention to both form and consistent practice remains the most trustworthy approach to build up core strength.
FAQ’s
What is a weighted crunch?
To do weighted crunches you perform basic crunches while gripping additional weight that increases exercise resistance and intensity.
How to do weighted crunch?
Start by placing your body in a position on the floor with bent knees as you hold the weight against your chest or near your head. Begin by engaging your core muscles before lifting your shoulders off the floor and pause briefly while at the top position until you descend down to start.
How many weighted crunches should I do?
The exercise pattern includes 2 to 4 sets and 8 to 15 repetitions but technical precision should always be maintained when adjusting the weight amount.
Do weighted crunches work lower abs?
Weighted crunches work to primarily develop your upper abdominal muscles. People seeking to work their lower abs can perform reverse crunches combined with leg lifts.
Do weighted crunches work?
Proper execution of weighted crunches helps people build abdominal strength while shaping muscle definition.
by indigiseo | Mar 5, 2026 | Health
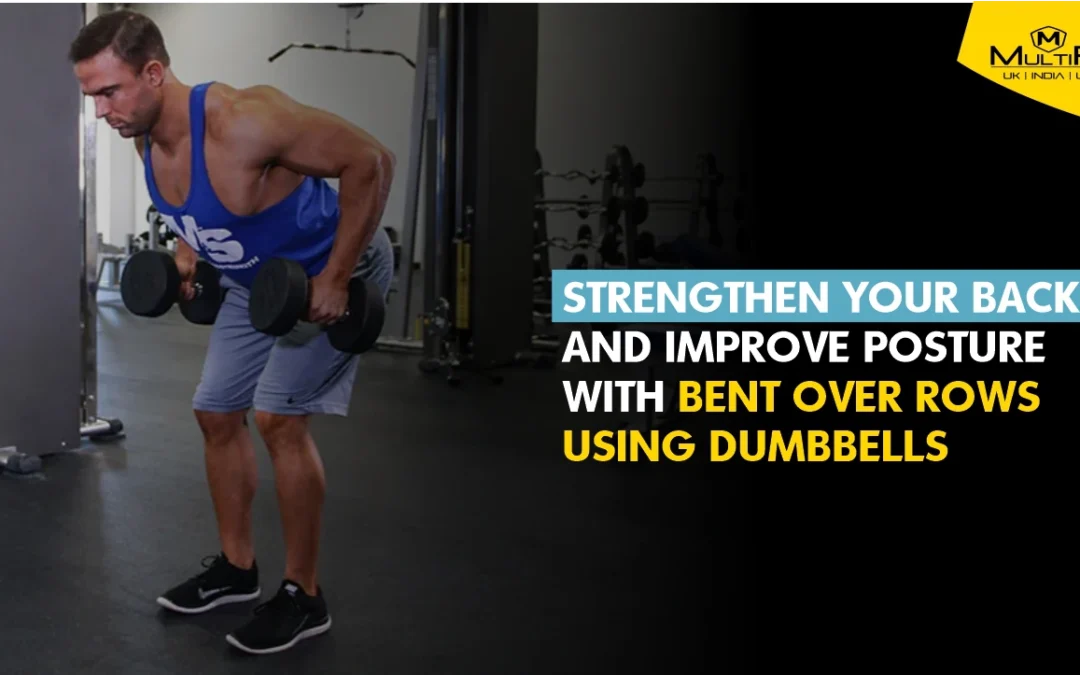
Strengthen Your Back and Improve Posture with Bent Over Rows Using Dumbbells
Do you slouch forward after hours of sitting with your head bowed over a desk or a phone?
The prolonged stay in this position can irritate your body and injure your health in future.
Bent-over rows with dumbbells in the fitness program may be helpful because your back muscles will be stronger and you will stay upright when you sit and stand. If you are new to working out or wish to intensify the workouts, you can see how bent over rows can significantly influence your well-being.
What Are Bent Over Rows with Dumbbells?
Doing bent over rows with dumbbells works the muscles in your upper and middle back.
Hinging at the hips and pulling the dumbbells close to your body uses many muscles at once, so it’s great for upper body strength.
Muscles Worked
Knowing the basics of dumbbell bent over row will help you benefit more from the exercise. This exercise primarily targets:
Latissimus Dorsi (Lats): Your large back muscles are used for pulling and also give your torso a V-shape.
Rhomboids: Lying between the shoulder blades, they help in pulling the shoulder blades down, which boosts posture.
Trapezius (Middle and Lower): They are important for keeping your scapulae steady and your back erect. But if you want to focus on this specifically, the front press can definitely help.
Posterior Deltoids: Your shoulders are better supported because the back of the deltoids keep the joints stable.
Biceps: When you pull, they help to make your arms stronger.
Forearms: When you hold the dumbbells, your grip improves.
Furthermore, the core supports your body during the exercise, which builds up strength and balance.
Benefits of Bent Over Dumbbell Rows
1. Improved Posture
Doing bent over dumbbell rowing regularly increases the strength of your posture muscles, helping to reverse harm from too much sitting or using screens.
2. Enhanced Upper Body Strength
Working on this exercise increases the strength of your back, shoulders, and arms, helping you perform well in day-to-day life and other exercises.
3. Core Stability
Incorporating core engagement as you lift increases your balance and helps you avoid lower back problems.
4. Functional Fitness
Doing this exercise that resembles daily pulling makes everyday tasks, like lifting, easier and safer to perform.
5. Versatility
Bent over dumbbell rowing is flexible, so it works for all fitness routines and can easily be changed depending on your goals.
Proper Dumbbell Row Posture
Your dumbbell row posture is important in two folds in getting maximum results and safety.
Follow these steps:
- Starting Position: Stand with the feet hip-width apart holding dumbbells in your both hands.
- Hinge at the Hips: Bend your upper body forward with the hips while keeping your back straight and your core tight so that you can form a 45-degree angle.
- Arm Position: Hold your arms downwards in such a way that your palms should be facing each other.
- Rowing Motion: Bring up the weights near to the waist while squeezing your shoulder blades together at the top.
- Controlled Descent: Lower the dumbbells slowly and keep under control as you go back to the starting position.
Do not incline your back or even swing your body because in case you get injured you will not obtain good results.
Variations to Try
To keep your workouts engaging and target muscles differently, consider these variations:
Single-Arm Row: Focuses on one side at a time, helping to correct muscle imbalances.
Supported Row: Place one knee and hand on a bench for added stability, reducing strain on the lower back.
Incline Row: Lie face down on an incline bench and perform the row, emphasizing the upper back muscles.
Are Bent Over Dumbbell Rows Good?
Absolutely.
The bent over rows with dumbbells program will provide you with various benefits such as good posture and greater strength of the upper body as well as better core stability. Their wide range of applicability as well as efficiency is an excellent exercise for even all people of the different fitness levels.
Conclusion:
By including a set of bent over rows with dumbbells into your fitness program, you will seriously advance your posture and make your upper body and core stable.
This simple and results-oriented practice eliminates such familiar troubles with sedentary lifestyles as difficulty of daily routine and injury, therefore. Through learning correct form and by progressively stepping up intensity, you will see the marked differences in your physical body health.
by indigiseo | Mar 5, 2026 | Blog
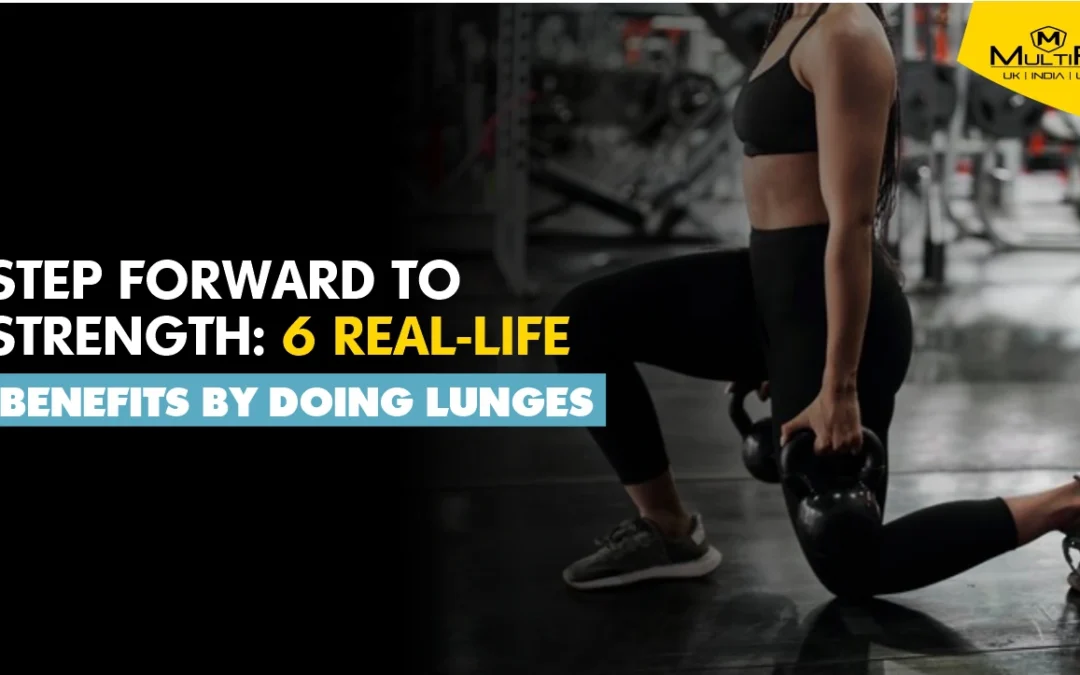
Step Forward to Strength: 6 Real-Life Benefits by doing Lunges
Experience difficulty when you attempt to climb stairs or raise objects from the floor?
Your daily routines require both strength and balance together with proper body coordination.
The addition of lunges to your workout routine enables better performance of everyday physical activities. This easy exercise provides major advantages which lead to improved daily performance and total fitness capabilities.
What Are Lunges?
Before exploring the lunges exercise benefits, let’s understand what are lunges.
Lunges consist of moving your lower body by stepping to different directions while bending knees to decrease your body position. The exercise duplicates regular movements such as stair-climbing and walking due to its functional nature.
Lunges Meaning in Fitness
Lunges meaning refers to a compound exercise which activates several muscle groups during one performance.
Lunges operate on each body half independently to fix strength gaps between sides and boost neuromotor coordination.
Lunges Exercise Benefits
Let’s see how the lunges exercise benefits us:
- Strengthens Lower Body Muscles: Muscle endurance and strength of quadriceps, hamstrings, glutes and calves improves through lunges.
- Improves Balance and Stability: Lunge exercises develop both proprioceptive abilities and coordination because exercises focus on each leg independently.
- Enhances Core Strength: Proper exercise form enables your core to engage which leads to better overall stability.
- Increases Flexibility: Performing lunges activates the hip flexor muscles and improves joint movement capabilities.
- Boosts Functional Fitness: Lunges help to maintain functionality by replicating natural human motions which strengthen the body in every aspect
- Supports Weight Management: Performing lunges as a combined exercise helps people shed calories and maintain their weight.
Lunges Exercise Muscles Worked
Let’s understanding the lunges exercise muscles worked:
Quadriceps:
Four muscle groups (rectus femoris along with vastus lateralis and vastus medialis and vastus intermedius) comprising the quadriceps exist at the front side of thigh tissues which people call the quads.
These muscles hold fundamental value for our routine movements including walking and stair climbing and standing from chairs and running with special significance during squats and lunges movements. The strength of quadriceps muscles provides both improved lower-body strength and enhanced knee joint stability that reduces the chance of injuries while improving movement stability.
Hamstrings:
The hamstrings include three muscles which exist behind the thigh region.
Biceps femoris and semitendinosus together with semimembranosus form the three muscles of the hamstrings. Bending the knee (knee flexion) stands as the main hamstrings muscle function as they also help extend the hip during movement to move the leg behind the body.
Walking, running, jumping and lunging require strong hamstring muscle action for proper performance. Your hamstrings both control movements while delivering power generation during physical movements.
Gluteus Maximus:
The gluteus maximus represents the biggest and most forceful buttocks muscle. The main function of gluteus maximus includes hip extension while it supports external hip rotation and abduction as well.
This large buttocks muscle enables important actions such as standing up and stair climbing while functioning most prominently during both running movements and squatting exercises and lunges.
When doing lunges the gluteus maximus muscle activates to return your body back to its starting position. A strong gluteal complex accomplishes lower-body motions as well as strengthens your lower back while improving both your posture and stability.
Calves:
Your calves consist principally of two muscles such as gastrocnemius and soleus which act jointly at the lower back of your lower leg. Your calves combine forces to elevate your heel throughout all kinds of foot movements such as walking, running and jumping.
Lunges require the calves to maintain ankle stability and balance when players move their weight between legs.
The strength of your calves enhances general lower body strength and defends your ankles from injury and supports quick and precise movements in sprinting and altering directions.
Core Muscles:
Multiple muscles in the anterior regions of the body make up the core muscles which include abdominals together with obliques as well as lower back and hip muscles. Together all these muscles form a complete unit that enables body stability and helps support our posture while protecting the spine.
Core muscles consist of rectus abdominis together with obliques as well as transverse abdominis combined with erector spinae and hip flexors. Strong core activation occurs during lunges since it helps you keep balance and sustain proper posture. A robust core body system provides both better physical stability and enhanced athletic potency and protects the lower back from possible injuries.
Types of Lunges Exercise
Let’s explore various types of lunges exercise:
- Forward Lunges: The exercise focuses on the quad and glute muscles when moving in this direction.
- Reverse Lunges: When stepping backward one can reduce knee strain.
- Walking Lunges: A forward movement pattern enables growth of balance and coordination performance.
- Side Lunges: Sidelong stepping performs inner thigh work and enhances movement in all directions
- Curtsy Lunges: When you cross a leg backward it activates both glutes and inner thighs.
- Jumping Lunges: The plyometric portion elevates both intensity levels and cardiovascular activity while being included.
Lunges Target Muscles
Focusing on lunges target muscles:
Gluteus Medius and Minimus: Stabilize the pelvis during movement.
Adductors: Inner thigh muscles aiding in leg movement toward the body’s midline.
Hip Flexors: Assist in lifting the thigh during the stepping motion.
Erector Spinae: Back muscles maintaining an upright posture.
Conclusion
Lunges as part of your fitness training improve your strength and balance alongside better overall body performance.
The exercise enables your body to become ready for routine daily activities so you can handle tasks like stair-climbing and object handling. Begin implementing lunges right now for immediate experience of their beneficial effects.
FAQ’s
How often should I do lunges?
Incorporate lunges into your workout 2-3 times a week, allowing rest days for recovery.
Can beginners perform lunges?
Yes, start with bodyweight lunges, focusing on form before adding resistance.
Are lunges suitable for people with knee issues?
Reverse lunges are gentler on the knees. Consult a healthcare professional before starting any new exercise.
Do lunges help in weight loss?
As a compound exercise, lunges burn calories and can aid in weight management when combined with a balanced diet.
Can lunges be done at home?
Absolutely, lunges require minimal space and no equipment, making them ideal for home workouts.