by indigiseo | Mar 8, 2026 | Aasan
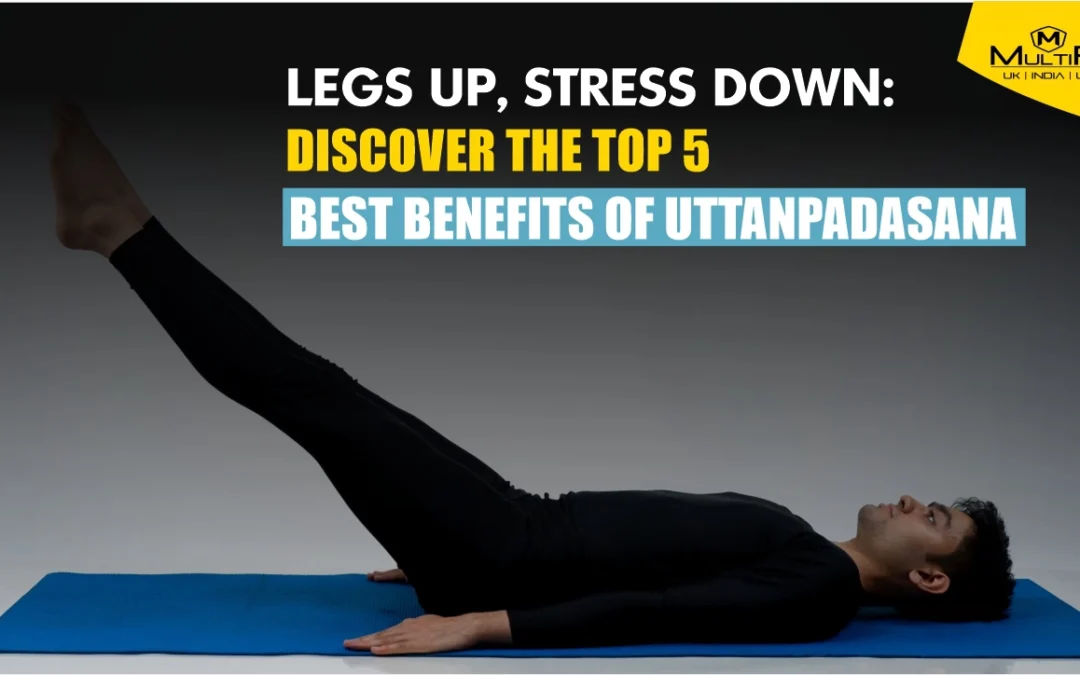
Discover the Top 5 Best Benefits of Uttanpadasana
A full day at your work desk always leaves you with lower back pain; along with leaving a sluggish feeling throughout.
One basic yoga posture exists which offers relief for these types of discomforts.
Practice Uttanpadasana also known as the Raised Leg Pose to bring relief to yourself.
Through practice of this asana you can strengthen your core as well as improve digestion and achieve a relaxed state of mind. So, let’s understand the benefits of Uttanpadasana together with performing instructions and safety-related points.
What is Uttanpadasana?
The Sanskrit origin of the posture derives from “uttana” (raised) and “pada” (leg) so it translates as The Raised Leg Pose.
Through this back-lying posture where you lift your legs you strengthen your core muscles and develop abdominal strength. Understanding the uttanpadasana meaning deepens our understanding of why this pose benefits both physical structure and mental state.
How to Do Uttanpadasana
Wondering how to do uttanpadasana? Follow these steps:
- Starting Position: Position yourself flat on the back while keeping legs together and arms extended at your sides.
- Leg Lift: Use a deep breath to lift both legs straight up to a 45 to 60-degree position maintaining the knees straight.
- Engage Core: Your abdominal muscles need to contract while performing this lift.
- Hold the Pose: Keep the position steady for 15-30 seconds while you breathe naturally.
- Release: End your breath then lower your legs slowly to their floor position.
Beginners can start by lifting one leg at a time or using a wall for support.
Top Benefits of Uttanpadasana
1. Strengthens Core Muscles
Uttanpadasana practice on a regular basis activates abdominal muscles to build core strength together with improving stability. Uttanpadasana practice helps reduce lower back pain and strengthens the body’s posture.
2. Improves Digestion
Through this pose your digestive organs receive stimulation along with relief from constipation and bloating symptoms.
3. Enhances Blood Circulation
Through leg lift motions during Uttanpadasana the asana directs blood toward the heart to boost circulation while simultaneously reducing the vulnerability to varicose vein development.
4. Tones Lower Body
Through its practice the asana activates multiple lower body components by toning pelvic muscles and strengthening thigh and hip structures.
5. Balances Energy Centers
Through its practice the practitioner activates their solar plexus chakra to achieve better energy flow and increased vitality.
Uttanpadasana Precautions
While beneficial, it’s essential to observe uttanpadasana precautions:
- Avoid if Pregnant: Pregnant women should refrain from this pose.
- Menstrual Cycle: It’s advisable to skip this asana during menstruation.
- Back or Neck Issues: Individuals with spinal problems should consult a doctor before practicing.
- Recent Surgeries: Avoid if you’ve had recent abdominal or spinal surgeries.
- High Blood Pressure: Those with hypertension should practice under guidance.
Who Should Avoid Uttanpadasana
Understanding who should avoid uttanpadasana is crucial:
- Pregnant Women: Due to abdominal pressure.
- Individuals with Hernia: The pose may exacerbate the condition.
- People with Severe Back Pain: It can strain the spine further.
- Those with Recent Surgeries: Especially abdominal or spinal.
- Individuals with High Blood Pressure: Risk of increased pressure.
Conclusion
Daily inclusion of Uttanpadasana will transform your physical practices significantly.
When you practice uttanpadasana you gain multiple benefits which include core strength alongside better digestion and enhanced blood circulation.
It’s essential to follow uttanpadasana precautions while recognizing who must stay away from this pose to practice it safely. A gradual approach combined with steady practice will give you remarkable benefits from this powerful postural transformation.
FAQ’s
Can Uttanpadasana help reduce belly fat?
Yes, definitely. Engaging the core muscles, functions as an effective way to tone abdominal muscles.
Is it safe to practice Uttanpadasana daily?
Practicing every day offers benefits but you please see an expert and take their advice when you’re not sure what you’re doing.
Can beginners perform Uttanpadasana?
Absolutely. The exercise should begin with each leg individually before you move forward.
Does Uttanpadasana aid in digestion?
This exercise activates digestive organs which enhance digestion functions.
Is it suitable for people with back pain?
Weak back pain symptoms might see improvement yet serious symptoms need doctor evaluation before treatment.

by indigiseo | Mar 8, 2026 | Aasan
8 Real Benefits of Superman Exercise You Need to Know
Never finished a long day with your shoulders hunched, back sore and breathing stilted?
I was one of those people until I discovered the benefits of superman exercise.
This easy action that never fails to draw ridicule on the internet, used to be my best friend in alleviating low-back pain, straightening posture and enhancing everyday strength, using none other than my body -and only the floor.
In a few days, I felt less insecure as I could stand in a taller and more fluid manner.
So, let us get into the explanation of why the superman exercise can be a revelation to you and how the efficient use of the superman pose can be retrofitted to any routine.
What Is the Superman Pose?
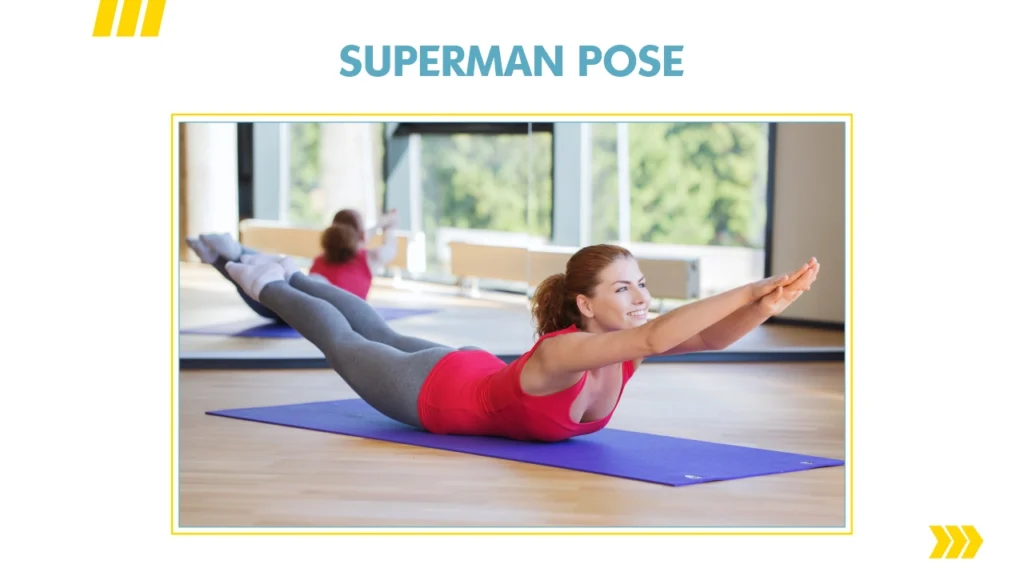
Superman pose exercise, also known as the superman pose yoga/body weight back extension involves the practice of lying face-down, with the arms extended in front of the body, in a manner that suggests that you are going to fly, which is followed by the movement of the arms and legs together.
It appears to be easy but involves multiple muscle groups at the same time.
Top Superman Exercise Benefits
Here are the most powerful superman exercise benefits I learned:
Strength in Back Muscles
The erector spinae- a chain that supports the spine is activated by the lifts. This increases the support in the spine and weakens chances of injury.
Improved Posture
Sleeping hours humped? This exercise powers up the muscles that help you to stand. It is described as a game changer.
Remedy of Lower Back Pain
The superman lifts are helpful daily to stabilize the lumbar sphere and minimize the pressure.
The Engagement of Full Posterior Chain
It wakes up the back deltoids and hard to reach areas, such as hamstrings, glutes and more. It’s the backbone of a posterior-chain.
Better Core Stability
You do not lift the back but work the abs, multifidus and obliques. Studies indicate that the stronger the core, the easier it moves and less injuries it entails.
Increase in Mobility/ Flexibility
Weak extension of the spine makes the back flexible without straining it especially when you sit a lot and it leaves the hips stiff.
No-Equipment, Easy Version
No mat, no tools–and you and the floor. It is affordable and pocket-friendly
Enhanced Mind – Body Connection
Keeping the focus on lift of arm and leg attracts consideration on breathing and motion.
How to Do the Superman Pose Exercise Safely
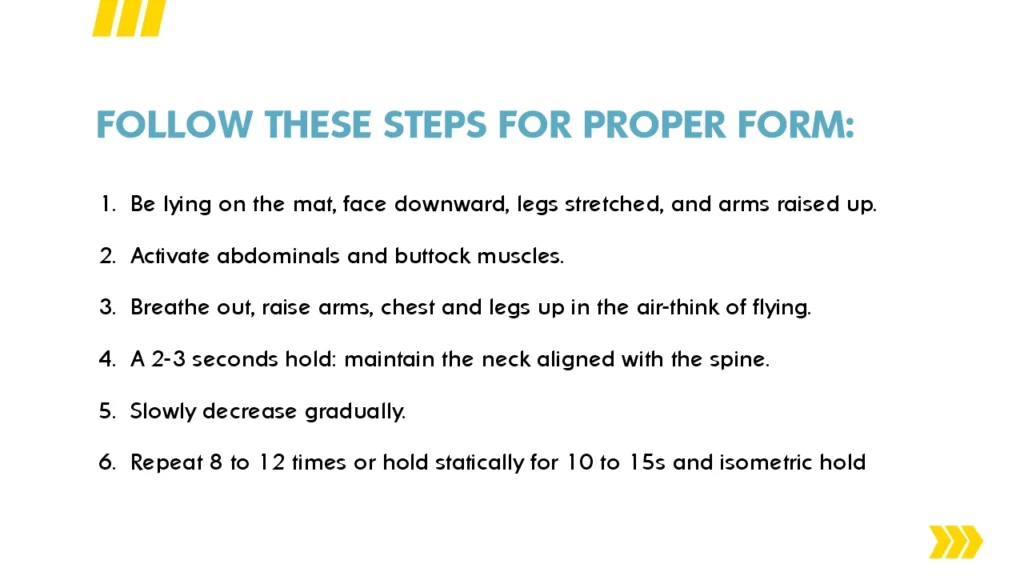
Follow these steps for proper form:
- Be lying on the mat, face downward, legs stretched, and arms raised up.
- Activate abdominals and buttock muscles.
- Breathe out, raise arms, chest and legs up in the air-think of flying.
- A 2-3 seconds hold: maintain the neck aligned with the spine.
- Slowly decrease gradually.
- Repeat 8 to 12 times or hold statically for 10 to 15s and isometric hold
Superman Exercise Variations
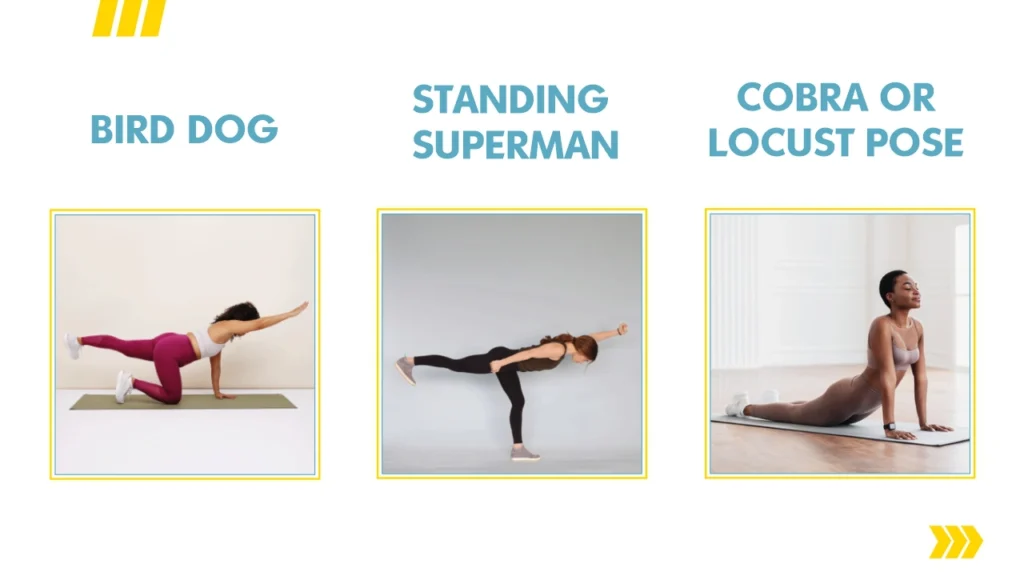
Bird Dog: While on hands and knees, reach opposite arms and legs out. Good for balance and oblique stability.
Standing Superman: While standing, hinge back at your hips and extend one arm and opposite leg. Good for balance.
Cobra or Locust Pose: A yoga back-bend variation that includes lifting the chest and upper-back instead of the legs.
Hints in Preparation
Keep it loose – don’t violently extend;
If your neck and/or lower back are sore, reduce range-of-motion, or make breaks between repetitions.
If you’re pregnant, just had abdominal surgery, or have some of the above rapid injurious events, modify or skip.
Finally, first begin with a simple hip-hinge, or a series of cat-cow to warm-up your lower-back and hamstrings.
Conclusion
In conclusion, the benefits of the Superman Exercise are more than looks.
It strengthens your back, helps develop better posture, feasts on unwanted pain, and keeps you consistent with everyday activity and ease.
It is a low- impact but high-value exercise that you can do anywhere!
If you sit a lot or often feel stiff, this exercise could have a meaningful change with little work. For the next week add a few repetitions each day, and see how your body feels.
FAQ’s
How often should I do Superman Exercise?
You may do it everyday, as long as it doesn’t irritate you. For added strength you would do it 2-3 times per week. Use either 8-12 repetitions or statically hold 10-15 seconds.
Will the Superman Exercise give me a big butt?
Yes, it is activating your glutes but it isn’t a butt workout. Consider it the bonus for spinal support.
Can Superman Exercise help my hunched shoulders?
Yes it helps with shoulder retraction because it activates the posterior chain to help improve your upper-body posture.
Is it safe for beginners?
Yes, just go slow. Reddit users mentioned that it helped their posture.
Should I static hold at the top or do repetitions?
Both are good for you! You may do one set of dynamic repetitions and static holds every time after that for some extra tension.
by indigiseo | Mar 5, 2026 | Aasan
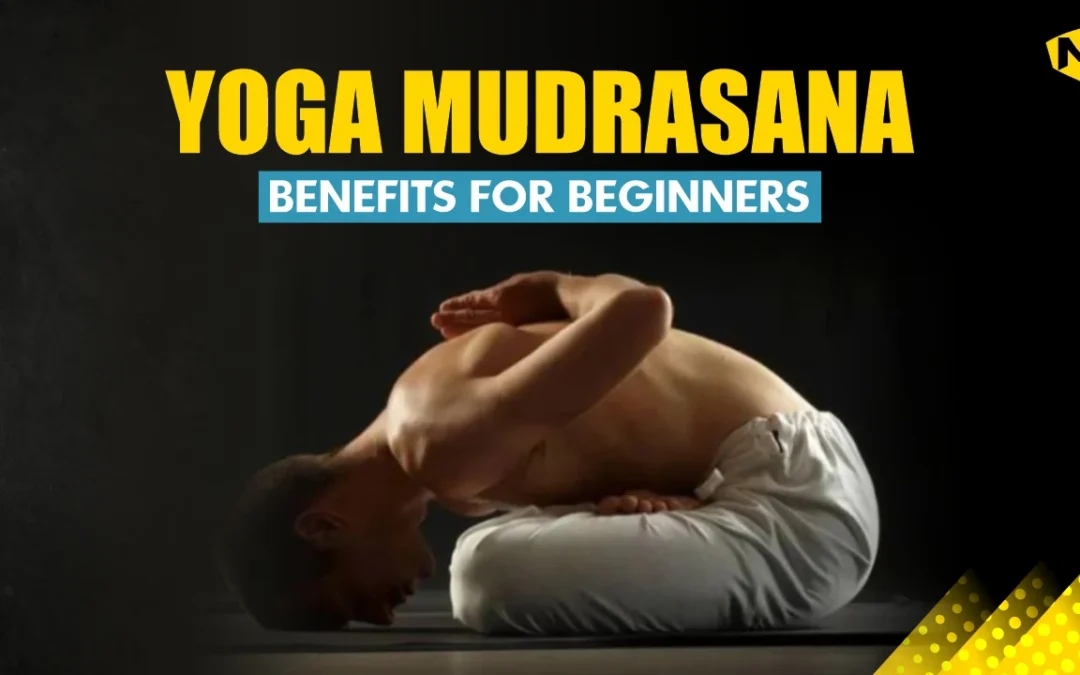
The World of Yoga Mudrasana: A Step by Step Guide, Benefits and More
There are times when it seems like life is spinning us around in an endless circle, and we have no time to stop and think about how we’re doing.That’s where the ancient practice of Yoga Mudrasana comes in.
This transformative pose is well- known in balancing the mind, body, and soul. If you’ve wondering about the benefits of yoga mudrasana or how it fits into your practice, you’re in the right place.
Let’s understand this powerful pose together.
What is Yoga Mudrasna?
It is also known as the Psychic Union Pose, which is a seated forward-bending posture.
“Mudra” means “Seal” in Sanskrit, and “Asana” means “Posture”. Together, these words form the word Mudrasana. This is seen as a symbol that represents a “seal of awareness”.
It is said, it’s also an anti-aging asana. This yoga pose helps people keep their young appearance and delay wrinkles.
Benefits of Yoga Mudrasana
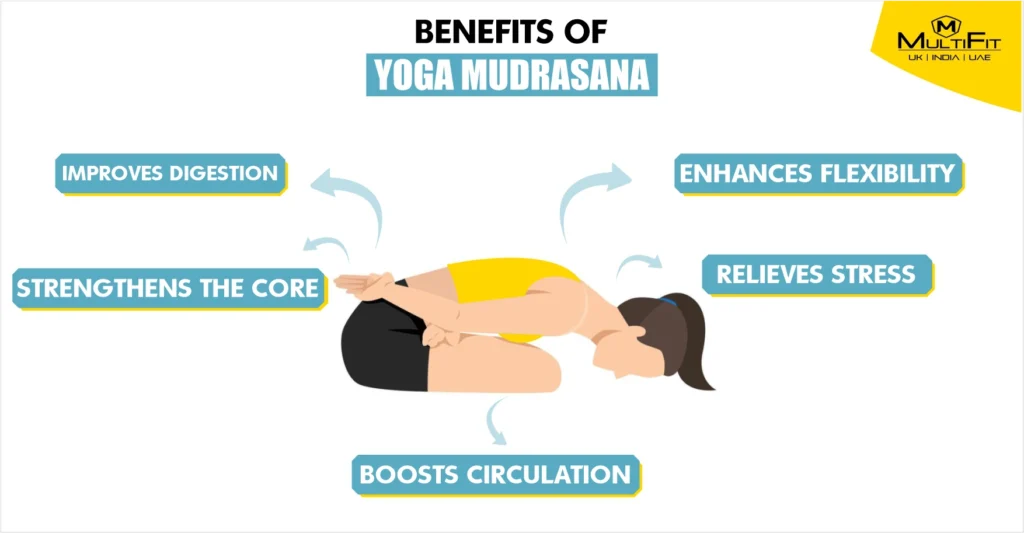
- Improves Digestion: It helps to stimulate the digestive organs which helps in metabolism and ease issues like bloating or constipation.
- Enhances Flexibility: This pose stretches the spine, shoulders, and hips, which increases your flexibility over time.
- Relieves Stress: While doing this pose you become relaxed and calm. It’s a great way to release tension after a long day.
- Strengthens the Core: You build core strength because in this pose your abdomen is being engaged.
- Boosts Circulation: The forward-bending movement increases blood flow to the head and upper body, revitalizing your system.
- Supports Mental Clarity: Practicing this pose encourages mindfulness, helping you feel more centered and focused.
How to Practice Mudrasana Yoga
– Sit on the floor in a cross-legged position. Padmasana (Lotus Pose) is ideal, but you can modify it to suit your flexibility.
– Place your hands behind your back and clasp them together, interlocking your fingers.
– Inhale deeply, elongating your spine.
– As you exhale, slowly bend forward, bringing your forehead towards the floor. Move gently and stop where you feel comfortable.
– Hold the position for 10-30 seconds, focusing on your breath.
– Inhale as you slowly rise back to the starting position. Release your hands and relax.
Yoga Mudrasana Benefits for Beginners
If you’re new to this pose, don’t worry about touching the floor immediately.
Even practicing a partial forward fold can provide benefits. Use a cushion or yoga block to support your head and make the pose more accessible.
Final Thoughts
Yoga Mudrasana is a simple way to reconnect with yourself. It helps you find calm, clarity, and balance.
By practicing this pose, you take a moment to pause, breathe, and embrace the present. As you include it in your routine, remember it’s not about perfection but connection.
Every practice is a step toward feeling more grounded and aware. Try it, and see how this pose can bring a sense of peace and strength into your day.
FAQ’s
Is Yoga Mudrasana suitable for everyone?
It’s best for those with moderate flexibility. If you have back pain, hip issues, or knee problems, consult with a yoga instructor before trying it.
Can Mudrasana Yoga help with stress relief?
Absolutely. The pose encourages deep breathing and relaxation, which are key to reducing stress.
How often should I practice the Yoga Mudrasana pose?
You can include it in your daily routine or practice it 3-4 times a week, depending on your comfort level and goals.
What’s the difference between Yoga Mudrasana and other forward bends?
Yoga Mudrasana combines a meditative focus with the physical benefits of a forward bend, making it a holistic pose for both body and mind.
by indigiseo | Mar 5, 2026 | Aasan
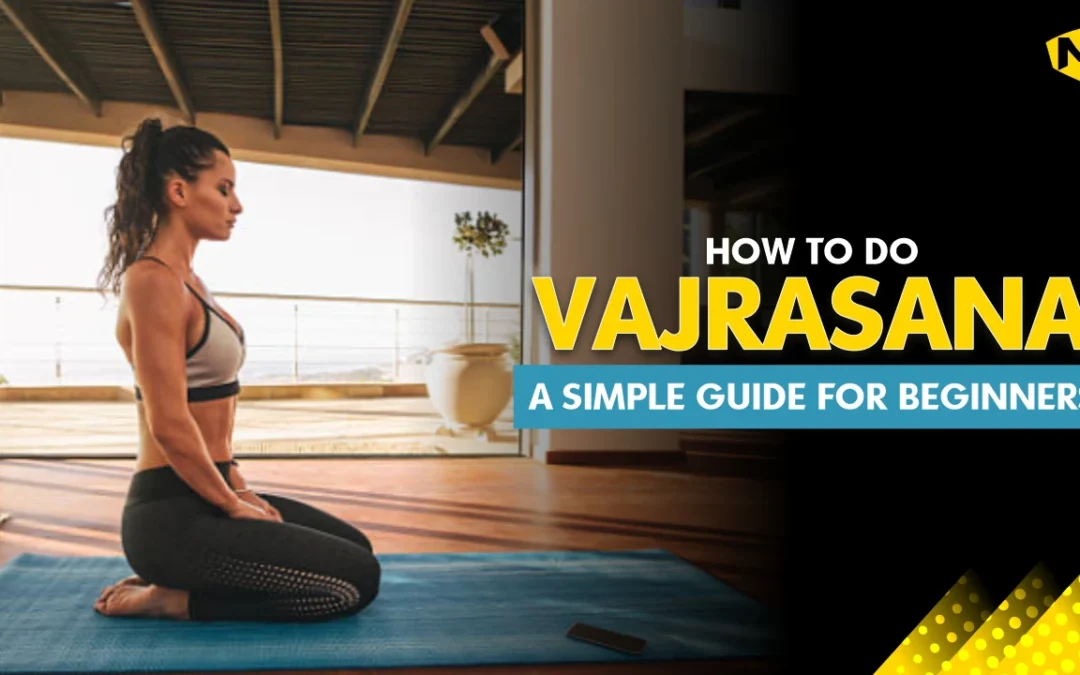
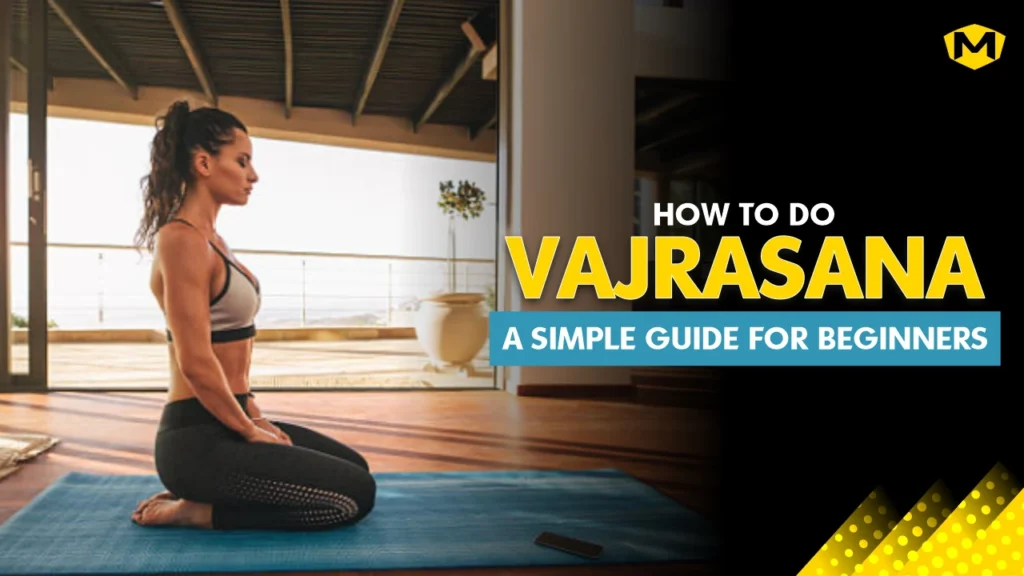
How to Do Vajrasana: A Simple Guide for Beginners
Vajrasana, from the Sanskrit word ‘Vajra’ known as the Thunderbolt or Diamond pose.
This is a wildly known posture which can help in your physical and mental health. In this blog, let me walk you through how to do Vajrasana, its steps, benefits, and more.
What is Vajrasana?
It’s a posture where you kneel and sit on your heels. Your spine should be straight and your shoulders relaxed. Doing this after having your meal is recommended because it helps in digestion.
The fun fact is that you can do it at any time of the day. Unlike many yoga poses, Vajrasana also makes it great for meditation or pranayama.
Vajrasana Steps: How to Do Vajrasana
If you’re wondering how to do Vajrasana correctly, follow these simple vajrasana steps:
1. Start on Your Knees
Kneel on a mat with your knees together. Your feet should be flat on the floor and your toes straight back.
2. Sit on Your Heels
Gently lower your hips and sit on your calves. If this is too intense for your knees, place a cushion or folded blanket under your hips for comfort.
3. Position Your Hands
Rest your hands on your knees. Keep your fingers relaxed and straight.
4. Straighten Your Spine
Engage your core, keep your back straight and sit upright. Your neck and head should align with your spine. Don’t lean forward or backward.
5. Relax and Breathe
Close your eyes and slow breath. Hold the position for as long as you feel comfortable.
Supta Vajrasana Steps
It’s a deeper variation of Vajrasana, called the Supta Vajrasana or the Reclining Thunderbolt Pose.
Here are the supta vajrasana steps:
1. Begin in Vajrasana
Start by sitting in the traditional Vajrasana position.
2. Lower Slowly
Gently lean backward while keeping your spine straight. Place your hands behind you for support.
3. Rest on Your Back
Slowly lie down on your back. Your knees should be bent and your feet flat on the ground. Use a cushion for support if needed.
4. Hold and Breathe
Hold this position while steadily breathing for a few minutes, then slowly come back up.
Uses of Vajrasana
It has various uses:
Improves Digestion: Blood circulation to the digestive organs improves. Try this pose as it helps you have better digestion after meals.
Reduces Stress: While you’re breathing calmly in that pose, you can reduce stress and anxiety.
Aids Posture: You will build a good posture, especially for people, who spend long hours sitting.
Benefits of Vajrasana
The benefits of Vajrasana include:
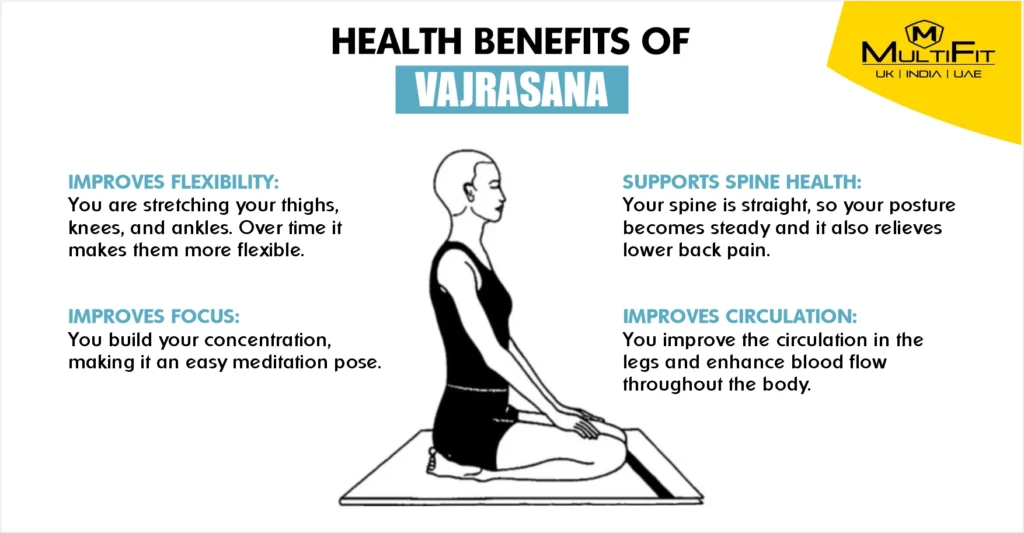
- Improves Flexibility: You are stretching your thighs, knees, and ankles. Over time it makes them more flexible.
- Improves Focus: You build your concentration, making it an easy meditation pose.
- Supports Spine Health: Your spine is straight, so your posture becomes steady and it also relieves lower back pain.
- Improves Circulation: You improve the circulation in the legs and enhance blood flow throughout the body.
Vajrasana Posture: Tips to Correctly do it
To ensure you maintain the correct vajrasana posture, keep the following in mind:
- The knees and thighs should be in a straight line.
- The shoulders should be relaxed with the spine straight.
- Your chest should be open, and your abdomen should feel relaxed.
Position Vajrasana: Making It Comfortable
Some people find it difficult to sit directly on their heels. If that is the case for you, here’s how to adjust the position Vajrasana:
Use a cushion or folded towel under your hips or thighs to elevate them slightly.
You can also try placing a soft mat under your knees for added comfort.
Conclusion
Vajrasana is a simple yoga pose that you can do anywhere, at any time. By understanding and following the steps for Vajrasana, you will know how the pose is beneficial, like having improved digestion, reduced stress, and better posture.
The more consistently you practice, the more you’ll experience its positive effects.
FAQ’s
How long should I hold Vajrasana?
You can hold for 5–10 minutes at first and then slowly increase the duration as you become more comfortable.
Can Vajrasana help with back pain?
Yes, practice regularly, and you will improve your posture and relieve tension in the lower back.
Is Vajrasana safe for beginners?
Absolutely! It’s beginner-friendly for all body types. However, always listen to your body and stop if you feel any discomfort.
Can I do Vajrasana after meals?
Yes, do try after having your meal, as it can help improve digestion.
What is the best time to practice Vajrasana?
You can practice it at any time of day, but would recommend after eating or during meditation sessions.
by indigiseo | Mar 4, 2026 | Aasan
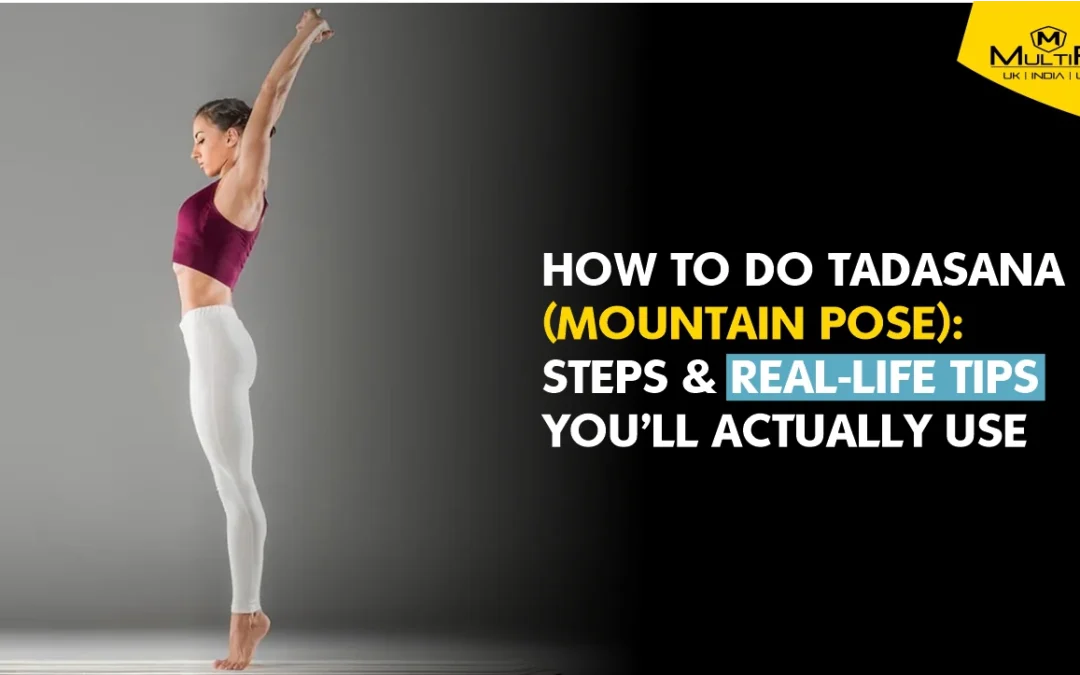
How to Do Tadasana (Mountain Pose): Steps & Real-Life Tips You’ll Actually Use
The number of hours spent hunched over work or devices could cause your body to slump, isn’t it?
Slowly you may be able to sense how your shoulders feel tensioned and your back becomes stiff sitting.
But there’s an effortless way to take back your posture and attention – let’s try the Tadasana, Mountain Pose. It’s not just standing; it’s standing with purpose.
Let me walk you through how to do tadasana, its benefits, and things to keep in mind.
What Is Tadasana?
Tadasana or Mountain Pose is an initial pose in yoga.
This name comes from the Sanskrit words “tada” for mountain, and “asana” meaning a pose.
In this pose, you center yourself on being upright, rooted to the ground and against your vertical self.
This is a posture that is used at the beginning of many yoga sequences and builds an understanding of your own body.
How to Do Tadasana: Step-by-Step
Let us start with a simple guide on tadasana procedure:
- Set up with a single or shoulder-width placement, place your body weight evenly on both feet.
- Just engage your quadriceps a little by lifting your kneecaps, pay attention not to lock your knees.
- Tuck your tailbone into your body and lift your head in order to elongate your spine.
- Exhale, break the tension from your shoulder by slowly lifting them away from your ears and rolling them back.
- Unwind your arms on your sides, keeping your palms facing forward.
- Approach your sternum by lifting your chin and focus your eyes gently in front.
- Continue to breathe deeply, with your breaths as consistent and even as possible, in the pose.
- Hold this position for a minute or less and mind your breathing while ensuring that your body is straight.
Tadasana Benefits
Practicing Tadasana regularly offers several benefits:
- Improves spinal alignment and helps to keep proper overall body mechanics.
- Enhances your stability and balance for movement, and success in both work and fitness activities.
- Build arm, leg strength, especially in the thighs, knees and ankles.
- Develops higher body awareness by making you more aware of your movements.
- Promotes bigger mental alertness and concentration due to attentive breathing exercises and quiet times.
Disadvantages of Tadasana
Tadasana is generally quite a safe posture for most people but there are a few things to take into consideration.
Dizziness or lightheadedness: If you experience these symptoms, namely when you stand for a long time, it is safer to practise with a wall or support close.
Low blood pressure: If you feel like your symptoms are increasing in intensity while in the position of remaining still it is advised that you consult with your healthcare provider before having a try at this pose.
Pregnancy: When pregnant, it is recommended that people do Tadasana placing their feet shoulder-width apart to ensure stability.
Recent injuries: Those with ankle knee or back injuries should be careful and seek direction from an experienced instructor.
Tips for Practicing Tadasana
Use a mirror: Practicing in front of a mirror can help you check your alignment.
Focus on breath: Deep, steady breathing enhances the calming effects of the pose.
Incorporate into daily routine: Even a few minutes of Tadasana can help reset your posture during the day.
Conclusion
It is at this point that you are completely prepared to practice Tadasana, a simple, highly effective posture affecting posture, body consciousness and calm, slow breathing.
By understanding how to do Tadasana, learning how to properly execute the exercise and realizing the advantages and limitations of this exercise we see that
Tadasana is not just an exercise of standing upright. Integrating it to your daily regimen can make you become better balanced and attentive, especially if you sit or slump over for long periods. The adoption of even the least habit of standing tall can lead to significant and lasting improvement of your daily activities.
FAQ’s
How often should I practice Tadasana?
Short daily practices may result in better posture and mindfulness.
Can Tadasana help with back pain?
In fact, proper posture can reduce minor back stiffness. However, if you feel discomfort, consult qualified professional medical advice.
Is Tadasana suitable for beginners?
Absolutely. This pose makes a good foundational position for anybody with or without physical limitations.
What are the common mistakes in the steps of Tadasana?
Repeated errors include locking the knees, slumping of the shoulders, unequal weight on the feet, or sticking out the chin. Concentrating on every guidance in the tadasana step list can avoid the repetition of these mistakes.
What’s the difference between simply standing and doing Tadasana?
Regular standing is usually passive. Doing Tadasana, you tone your muscles, correct your posture and turn your attention to your breath. It’s the combination of focused attention and purposeful effort that makes Tadasana specially unique.
by indigiseo | Mar 4, 2026 | Aasan
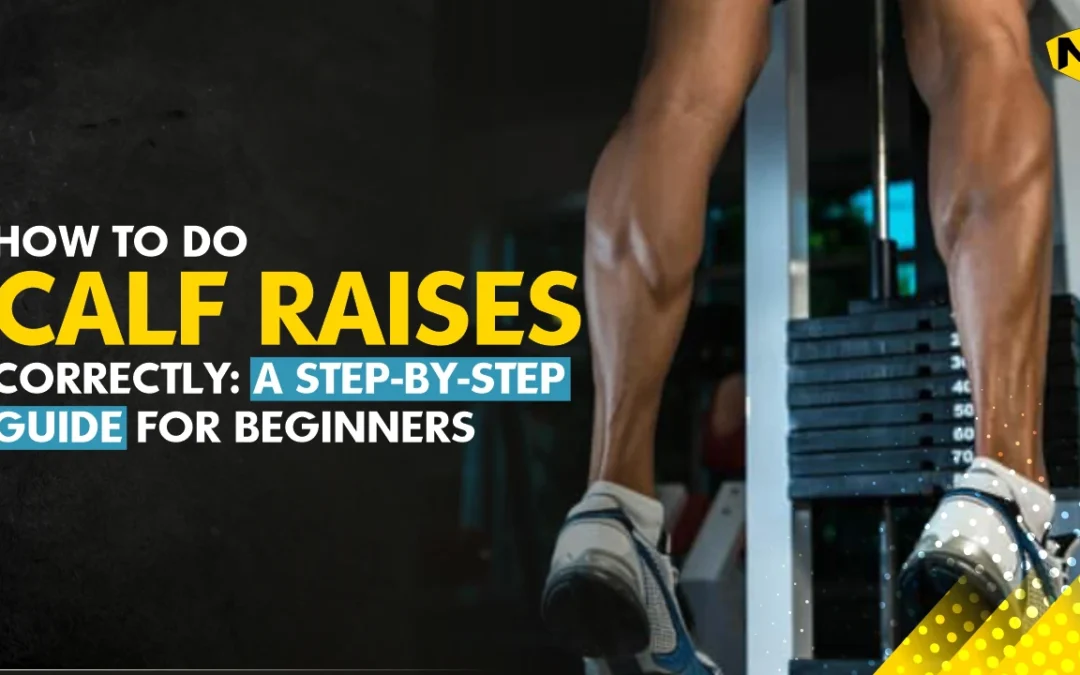
Calf raises are an important exercise of the lower body that you can do if you want to work your lower legs. Calf raises are also called standing calf raises and work by activating your calf muscles as you stand on your the tips of your toes. In this blog, we’ll find out the proper technique to do calf raises, a calf raises workout routine for them, and the benefits of doing them.
How to do Calf Raises Correctly | Calf Raise Workout Technique
There’s a correct way to do calf raises which when not done properly could lead to injuries and cramps. It’s recommended that you do two to three sets of fifteen to twenty reps two to three times a week. You can also add them as a finisher at the end of your workout.
● 2-3 Sets, 15-20 Reps
Here’s how to do calf raises with the perfect form:
1. Stand with a slight bend in your knees.
2. Keep a neutral head and neck position.
3. Keep your chin tucked.
4. While maintaining a straight back, shift your weight onto your toes and squeeze your calves.
5. Pause for a few seconds.
6. Slowly lower to the starting position, allowing your heels to contact the floor.
7. Repeat.
Calf Raises Workout Routine
There are three main variations of the classic calf raise that you can do in a calf raises workout:
1. Calf Raise Seated
The seated calf raise works on one set of muscles, the soleus muscle (The calf muscle.) This is best for people who find it hard to balance on the balls of their feet.
Here’s how to do a Seated Calf Raise:
1. Sit on a chair with your back straight, shoulders back and down, and feet flat on the ground.
2. Lift your heels off the ground while pushing down on the balls of your feet.
3. Do both heels together or one at a time.
4. Repeat
2. Dumbbell Calf Raises Standing
The dumbbell standing calf raise is basically a standing calf raise with weights. Here, you can use dumbbells, kettlebells, or even bottles of water to add weight to your raises. This can help you build strength in your calves as they work harder to lift the additional weight.
Just make sure to hold the weights properly at your side with your arms loose.