
by indigiseo | Mar 5, 2026 | Exercises
Endurance training is like a supercharged workout that helps athletes become tougher and more energetic. It’s all about doing exercises that make your heart and muscles stronger so you can keep going for longer without getting tired. By doing things like running and lifting weights, endurance workouts build up your body’s ability to keep going strong, making you more resilient and giving you extra stamina to keep pushing through tough workouts, competitions, or daily life activities.
Building resilience and stamina with endurance workouts
Here are six points outlining how endurance training builds stamina and resilience:
1. Enhanced Cardiovascular Efficiency
Endurance workouts improve the heart’s efficiency in pumping blood and delivering oxygen to working muscles. Through sustained aerobic activity, such as running or cycling, the cardiovascular system adapts by increasing stroke volume (the amount of blood pumped per beat) and cardiac output (the volume of blood pumped per minute), resulting in improved stamina during prolonged physical exertion
2. Increased Mitochondrial Density
Mitochondria are the powerhouses of cells responsible for generating energy. Endurance training stimulates the growth and proliferation of mitochondria within muscle cells, enhancing the capacity for aerobic energy production. This mitochondrial adaptation allows muscles to sustain activity for longer durations before fatigue sets in, contributing to improved stamina.
3. Muscular Endurance Development
Endurance training engages muscles in sustained activity, promoting adaptations that enhance their endurance capacity. This includes increased capillarization (the formation of small blood vessels, or capillaries, around muscle fibers), greater oxidative enzyme activity, and improved muscle fiber recruitment patterns. These adaptations enable muscles to maintain force production over extended periods, thereby bolstering resilience to fatigue.
4. Improved Energy Utilization and Metabolism
Endurance workouts facilitate the body’s efficient utilization of fuel sources, such as carbohydrates and fats, during exercise. Through mechanisms like increased glycogen storage capacity and enhanced fat oxidation rates, endurance-trained individuals can sustain energy levels for prolonged periods of activity. This metabolic flexibility contributes to greater stamina and resilience by optimizing energy availability and utilization during exercise.
5. Enhanced Oxygen Transport and Utilization
Thanks to aerobic endurance training, the volume of blood increases by 10-15 %, which means the average volume of blood increases from 5 liters to 5.5-6 liters.Endurance training induces adaptations in the respiratory system, enhancing oxygen uptake, transport, and utilization by working muscles. This includes increased lung ventilation, improved oxygen diffusion across lung tissues, and enhanced oxygen-carrying capacity of blood through elevated red blood cell production and improved hemoglobin function. These respiratory adaptations enable the body to extract and utilize oxygen more efficiently, supporting sustained aerobic performance and resilience to fatigue.
6. Mental Toughness and Psychological Resilience
Endurance workouts challenge individuals both physically and mentally, fostering psychological resilience and mental toughness. Engaging in prolonged, demanding workouts cultivates discipline, perseverance, and the ability to push through discomfort and fatigue. Over time, endurance-trained athletes develop confidence in their ability to endure hardship and overcome obstacles, translating to improved resilience in both athletic pursuits and daily life challenges.
10 endurance workouts you can try to build stamina
Endurance workouts include a variety of exercises aimed at improving cardiovascular and muscular endurance. Here are some common ones:

1. Running
2. Cycling
3. Swimming
4. Rowing
5. Jumping Rope
6. Circuit Training
7. High-Intensity Interval Training (HIIT)
8. Bodyweight Exercises
9. Weightlifting
10. Fartlek Training
Endurance training is key for boosting stamina and resilience. By engaging in various workouts like running, cycling, and swimming, individuals enhance cardiovascular efficiency, muscular endurance, and mental wellbeing. These adaptations enable sustained performance and better coping with challenges. Incorporating endurance exercises into routines empowers individuals to push limits, fostering resilience for both athletic endeavors and daily life.
by indigiseo | Mar 5, 2026 | Exercises
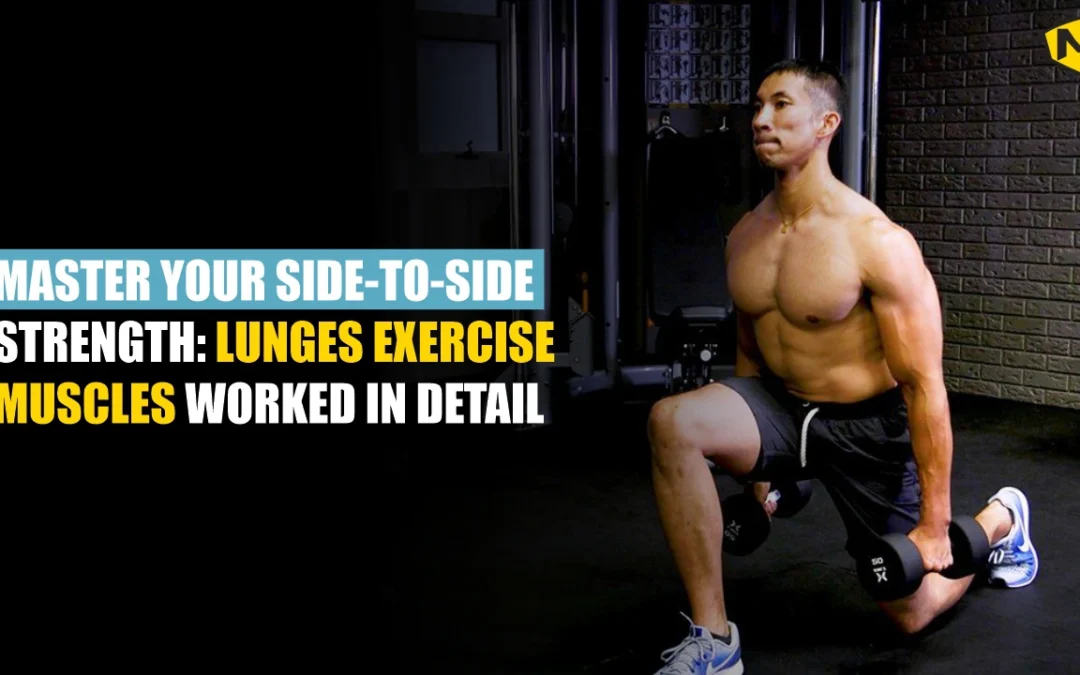
Master Your Side-to-Side Strength: Lunges Exercise Muscles Worked in Detail
Ever tried reaching sideways to grab something and there was a strange force to your inner thigh or lower back?
That slight feeling of discomfort in your body is telling you that it does not move this way enough.
Whereas most exercises are done in a horizontal direction, both lunges exercise muscles are worked in more than one plane, and sideways lunges exercise are the underdogs not known to all. These exercises help you gain strength where it matters the most in hips, thighs, and core. So what is so special about the side lunge benefits? Let us understand the reasons why it’s worth your time.
What Muscles Do Lunges Work?
Traditional Forward Lunges
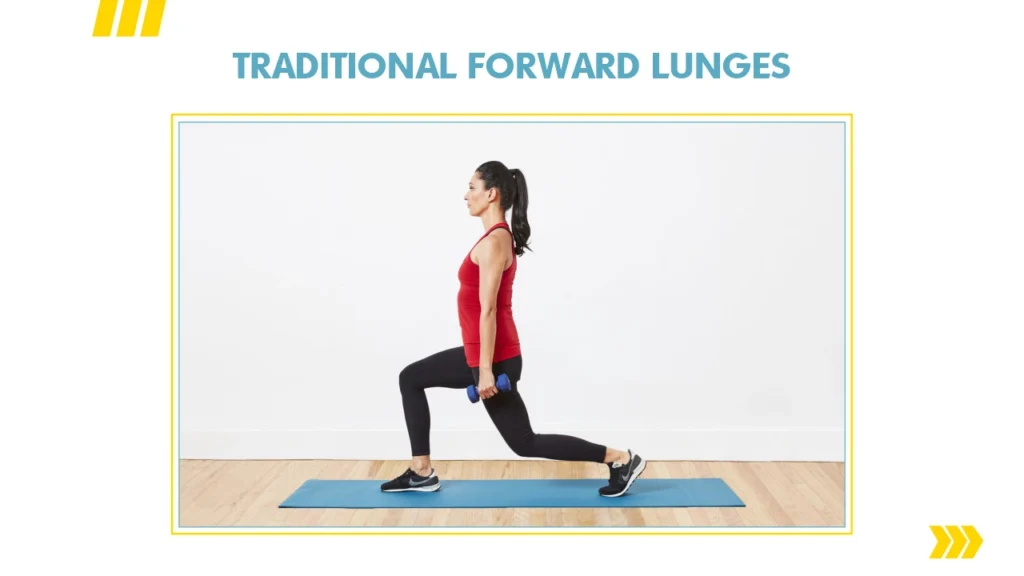
It is a leader of quads, glutes, and hamstrings.
Core muscles, such as obliques, acquired abdominis, and also calves aid in stabilization.
Concentric (standing up) as well as eccentric (depression) muscle activity in quads, glutes, ham strings is both a source of strength and size gains.
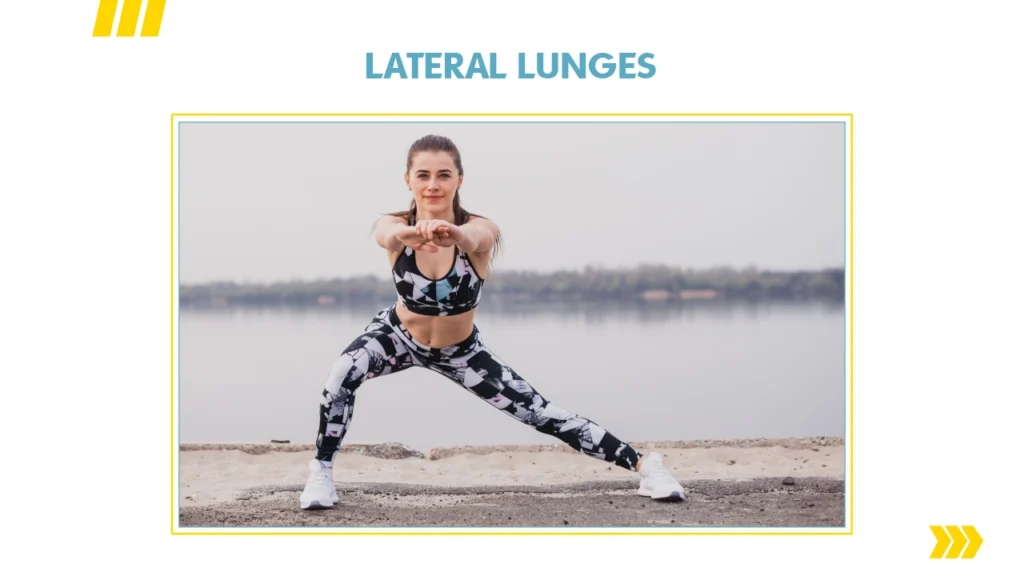
Side Lunge Benefits Explained
- Correction of muscle imbalances: This work utilizes one leg at a time in order to correct weaknesses.
- Improved stabilized support: It supports stabilizer muscles around knees, hips, and ankle.
- Increased core stability: Obliques, erector spinae and transverse abdominis maintain body stability during the motion.
- Less chance of injury: Groin strength reduces the risk of strains and lateral strength reduces falls or ankle rollouts .
- Functional movement: Moving forward is not the only action required on a day to day basis, side lunges practice real movements.
Side lunges exercise benefits in Action
Athletes like basketball, tennis, or soccer players build stronger lateral movements .
Runners improve stabilization when changing direction or dealing with unsteady surfaces.
People returning from injury find side lunges easier on the knees than forward lunges.
How to Do a Safe lateral lunges exercise
- Stand with feet hip-width apart, core tight.
- Step wide to one side—foot turns forward.
- Bend the stepping knee while pushing hips back, thigh parallel. Keep the other leg straight.
- Keep chest tall and spine neutral.
- Drive through the heel to return.
- Repeat on each side, or alternate.
Key form tips:
Don’t let your knee go past your toes to protect joints.
Keep both feet flat during the move.
Avoid leaning forward—lift your chest.
Why Include sideways lunges exercise?
Unique Muscle Activation
> When moving out, the inner thigh muscles (adductors) are activated more than during front lunges. Outer hips (glute medius) get put in more effort.
> The adductors and abductors are not working as well using regular lunges.
Balance & Joint Stability
> Side lunges present an ankle, knee and hip effort in a fresh plane – the frontal plane.
> Helps do the ordinary moves and things- such as stepping out of a car or losing balance.
Variations to Challenge Yourself
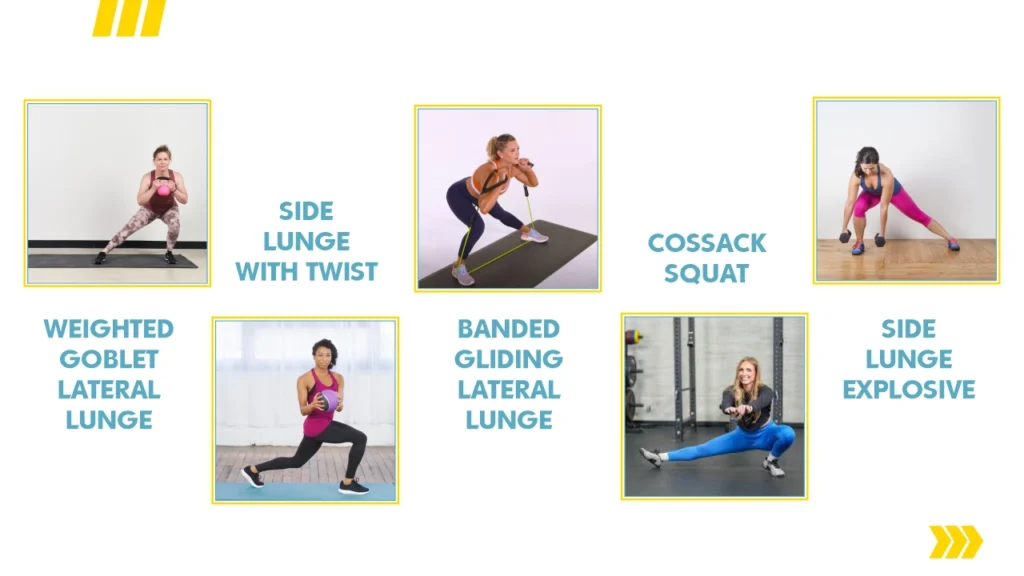
Weighted goblet Lateral lunge (dumbbell or kettlebell at chest) is more power and core building.
Side lunge with twist: a rotation of the torso towards the flexed knee will target obliques .
Using bands/gliders in Banded gliding lateral lunge enhances outer and inner thigh muscles.
Cossack squat: the lower, the better you train mobility and depth check as in side lunges without steps.
Side Lunge Explosive to a Knee Drive-Makes it into a burst.
Integrating into Your Workouts
Include side lunges one or two times per week- to be balanced with forward lunges.
Take 8-15 reps on each side as accessory work with exercises following large work, such as squats.
Beginners: Use bodyweight and then weights or bands with time.
Conclusion
Think of side lunges as your secret edge in real life.
Your hips, glutes, core and inner thighs have your back due to muscles worked in lunges exercise and the strength sideways lunges exercise.
Those side lunges benefits and side lunges exercise benefits translate to better balance, injury protection and day to day strength.
Add the exercises such as lateral lunges to your regime and you will feel the strength when you need it the most.
FAQ’s
Can I do side lunges every day?
Daily side lunges could strain muscles. Instead, do them 2–3 times weekly, allowing recovery days.
Are side lunges safe for knees?
Yes. They’re usually easier on knees than forward lunges if done with proper form .
How deep should I go?
Go as low as comfortable. Pushing too deep causes joint stress. Weight or mobility should guide depth.
Do they burn more calories?
They boost calorie burn compared to static moves. Adding explosive or weighted versions raises the burn rate.

by indigiseo | Mar 5, 2026 | Health
Know Your Number: How to Calculate BMI for Men and Women the Right Way
Have you ever looked at a health chart and ask yourself whether you are within the right range?
Perhaps you find yourself asking the question, “Am I healthy?”, after a holiday meal or when planning a fitness plan.
Understanding how to calculate BMI for men and women can provide the answer to that.
It is something straightforward that anyone can apply at home. You stand on a scale, you measure your height and you use a formula.
This small exercise can guide your health decisions. If you are about to embark on an exercise regime or you are simply inquisitive, knowing your BMI will give you a sense of clarity on where you are.
What Is Body Mass Index BMI Test and why Check Your BMI?
The (Body Mass Index) BMI test is the full form of the test that is used to refer to the simple ratio of height and weight to determine whether a person is underweight, normal, overweight, or obese.
- It employs kilograms and meters (or pounds and inches)
- No fancy equipment-just height, weight and a calculator
- Provides a brief overview of health
That’s why it’s so popular. It doesn’t need lab visits or complex methods.
So, why is it necessary to check your BMI:
- It assists in knowing the levels of health risks
- It tells whether you carry unnecessary body fat
- It is a weight goal guide such as bmi calculator to reduce weight
- You do it yourself at home, it is easy
Having your number can assist you in developing a workable plan.
How to Calculate BMI Men – Step by Step
Let’s go through bmi, how does it work out for men. It is almost the same for women.
Metric Method
Formulae: BMI = Weight (kg) / Height (m)²
- Step on a scale to get weight in kg.
- Stand straight and measure height in meters.
- Square your height (height × height).
- Divide weight by that squared height.
Example: If a man weighs 80 kg and is 1.80 m tall:
1.80 × 1.80 = 3.24
80 ÷ 3.24 ≈ 24.7
His BMI is 24.7.
Imperial Method
Formulae: BMI = [Weight (lb) / Height (in)²] × 703
- Get weight in pounds (lb) and height in inches (in).
- Square height (inches × inches).
- Multiply weight by 703.
- Divide by squared height.
Example: 175 lb and 70 in height:
70 × 70 = 4900
175 × 703 = 123,025
123,025 ÷ 4900 ≈ 25.1
BMI is about 25.1.
Calculate BMI Women – Is It Any Different?
The process is identical.
The same formula works for both men and women.
- Measure weight and height
- Apply formula
- Get the result
Your gender doesn’t change the math. But it may influence interpretation. A woman’s body fat distribution differs, so health professionals look at numbers a bit differently.
BMI Categories and What They Mean
When you get your number, here’s how to read it:
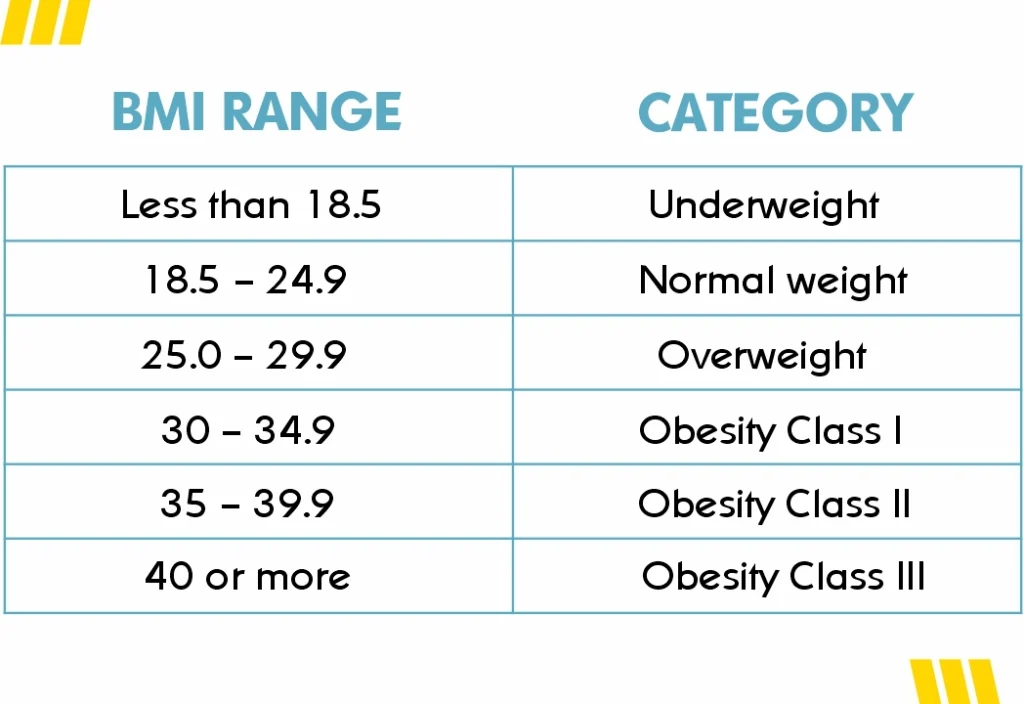
These categories guide your next steps. If you’re in the overweight range or higher, tools like bmi calculator for losing weight could help set safe targets.
Using BMI According to Height
35–39.9
Because BMI adjusts for height, it gives a fair view of body mass across people of different statures.
- A tall person with 80 kg but a BMI of 24.7 is healthy.
- A shorter person with the same weight might land in overweight range.
This is why bmi according to height matters. It normalizes weight.
Pros and Cons of BMI
Pros
Quick and free method
Easy to repeat at home
Helps track health changes
Cons
Doesn’t distinguish muscle from fat
May be misleading for muscular people or the elderly
Doesn’t explore fat distribution (like belly fat)
Understand that BMI is a guide—not the whole picture.
Tips to Use Your BMI Numbers
If you’re aiming to lose weight, try a bmi calculator for losing weight to set safe goals.
Take periodic measurements every few weeks.
Remember, muscle may increase your number without adding fat.
Use other tools too—like waist circumference and fitness levels.
Conclusion
Understanding how to work out bmi men and women can guide you better in life. If your goal is to lose weight, stay fit or you just need to be aware of your position, this is an exercise that provides you with a clear figure.
It can be incorporated into daily life, you just need to step on the weighing scale, measure your height and do the calculations.
In the long run, it turns into a method to observe improvements and adjust your strategy. Try it today. Now, have this easy tool, and you are all set to fine-tune your health, one number at a time.
FAQ’s
Is how to calculate bmi for men the same for women?
Yes. The same formula works for both. Gender doesn’t change math.
What is the bmi test full form?
It stands for Body Mass Index test.
Can BMI predict health risks?
It shows whether you carry extra weight that could raise health risks. It’s part of a bigger picture.
Should I use bmi according to height only?
No. Check waist size, body composition, and how you feel overall too.
How can I get better results using the bmi calculator for losing weight?
Pick healthy targets, combine diet and activity, and track your results over time.
by indigiseo | Mar 5, 2026 | Aasan
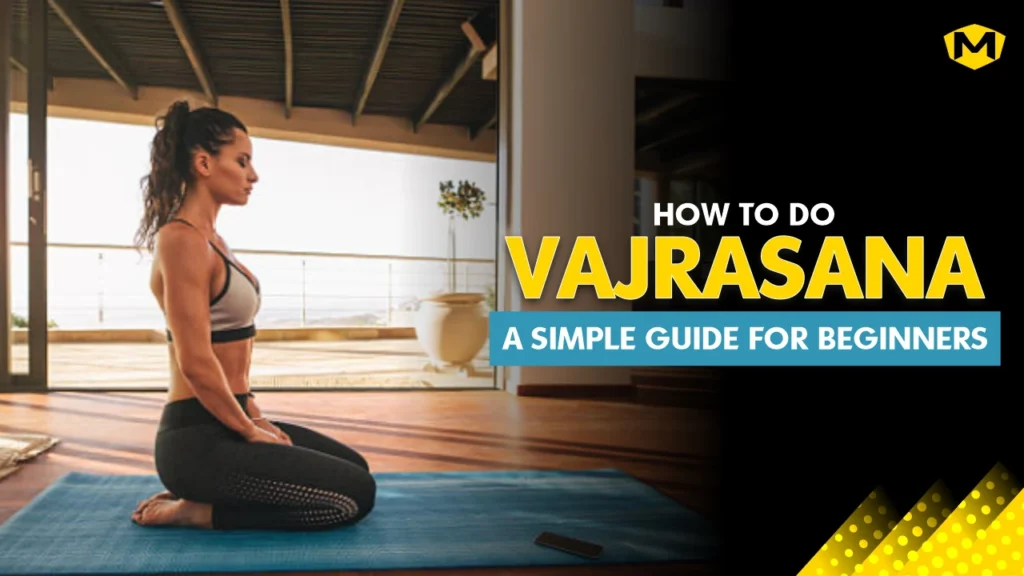
How to Do Vajrasana: A Simple Guide for Beginners
Vajrasana, from the Sanskrit word ‘Vajra’ known as the Thunderbolt or Diamond pose.
This is a wildly known posture which can help in your physical and mental health. In this blog, let me walk you through how to do Vajrasana, its steps, benefits, and more.
What is Vajrasana?
It’s a posture where you kneel and sit on your heels. Your spine should be straight and your shoulders relaxed. Doing this after having your meal is recommended because it helps in digestion.
The fun fact is that you can do it at any time of the day. Unlike many yoga poses, Vajrasana also makes it great for meditation or pranayama.
Vajrasana Steps: How to Do Vajrasana
If you’re wondering how to do Vajrasana correctly, follow these simple vajrasana steps:
1. Start on Your Knees
Kneel on a mat with your knees together. Your feet should be flat on the floor and your toes straight back.
2. Sit on Your Heels
Gently lower your hips and sit on your calves. If this is too intense for your knees, place a cushion or folded blanket under your hips for comfort.
3. Position Your Hands
Rest your hands on your knees. Keep your fingers relaxed and straight.
4. Straighten Your Spine
Engage your core, keep your back straight and sit upright. Your neck and head should align with your spine. Don’t lean forward or backward.
5. Relax and Breathe
Close your eyes and slow breath. Hold the position for as long as you feel comfortable.
Supta Vajrasana Steps
It’s a deeper variation of Vajrasana, called the Supta Vajrasana or the Reclining Thunderbolt Pose.
Here are the supta vajrasana steps:
1. Begin in Vajrasana
Start by sitting in the traditional Vajrasana position.
2. Lower Slowly
Gently lean backward while keeping your spine straight. Place your hands behind you for support.
3. Rest on Your Back
Slowly lie down on your back. Your knees should be bent and your feet flat on the ground. Use a cushion for support if needed.
4. Hold and Breathe
Hold this position while steadily breathing for a few minutes, then slowly come back up.
Uses of Vajrasana
It has various uses:
Improves Digestion: Blood circulation to the digestive organs improves. Try this pose as it helps you have better digestion after meals.
Reduces Stress: While you’re breathing calmly in that pose, you can reduce stress and anxiety.
Aids Posture: You will build a good posture, especially for people, who spend long hours sitting.
Benefits of Vajrasana
The benefits of Vajrasana include:
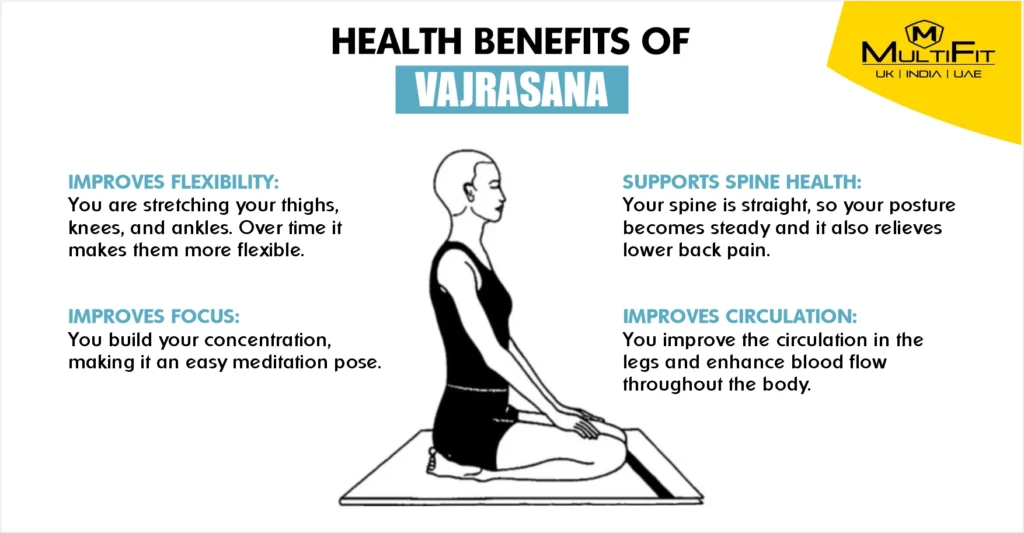
- Improves Flexibility: You are stretching your thighs, knees, and ankles. Over time it makes them more flexible.
- Improves Focus: You build your concentration, making it an easy meditation pose.
- Supports Spine Health: Your spine is straight, so your posture becomes steady and it also relieves lower back pain.
- Improves Circulation: You improve the circulation in the legs and enhance blood flow throughout the body.
Vajrasana Posture: Tips to Correctly do it
To ensure you maintain the correct vajrasana posture, keep the following in mind:
- The knees and thighs should be in a straight line.
- The shoulders should be relaxed with the spine straight.
- Your chest should be open, and your abdomen should feel relaxed.
Position Vajrasana: Making It Comfortable
Some people find it difficult to sit directly on their heels. If that is the case for you, here’s how to adjust the position Vajrasana:
Use a cushion or folded towel under your hips or thighs to elevate them slightly.
You can also try placing a soft mat under your knees for added comfort.
Conclusion
Vajrasana is a simple yoga pose that you can do anywhere, at any time. By understanding and following the steps for Vajrasana, you will know how the pose is beneficial, like having improved digestion, reduced stress, and better posture.
The more consistently you practice, the more you’ll experience its positive effects.
FAQ’s
How long should I hold Vajrasana?
You can hold for 5–10 minutes at first and then slowly increase the duration as you become more comfortable.
Can Vajrasana help with back pain?
Yes, practice regularly, and you will improve your posture and relieve tension in the lower back.
Is Vajrasana safe for beginners?
Absolutely! It’s beginner-friendly for all body types. However, always listen to your body and stop if you feel any discomfort.
Can I do Vajrasana after meals?
Yes, do try after having your meal, as it can help improve digestion.
What is the best time to practice Vajrasana?
You can practice it at any time of day, but would recommend after eating or during meditation sessions.
by indigiseo | Mar 4, 2026 | Aasan
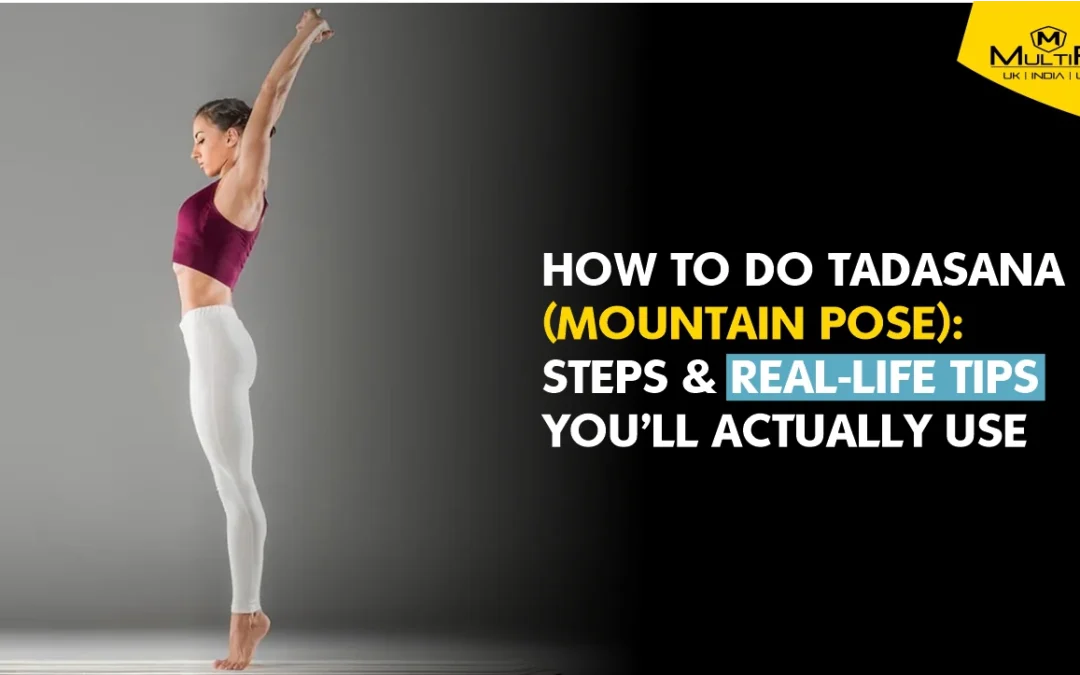
How to Do Tadasana (Mountain Pose): Steps & Real-Life Tips You’ll Actually Use
The number of hours spent hunched over work or devices could cause your body to slump, isn’t it?
Slowly you may be able to sense how your shoulders feel tensioned and your back becomes stiff sitting.
But there’s an effortless way to take back your posture and attention – let’s try the Tadasana, Mountain Pose. It’s not just standing; it’s standing with purpose.
Let me walk you through how to do tadasana, its benefits, and things to keep in mind.
What Is Tadasana?
Tadasana or Mountain Pose is an initial pose in yoga.
This name comes from the Sanskrit words “tada” for mountain, and “asana” meaning a pose.
In this pose, you center yourself on being upright, rooted to the ground and against your vertical self.
This is a posture that is used at the beginning of many yoga sequences and builds an understanding of your own body.
How to Do Tadasana: Step-by-Step
Let us start with a simple guide on tadasana procedure:
- Set up with a single or shoulder-width placement, place your body weight evenly on both feet.
- Just engage your quadriceps a little by lifting your kneecaps, pay attention not to lock your knees.
- Tuck your tailbone into your body and lift your head in order to elongate your spine.
- Exhale, break the tension from your shoulder by slowly lifting them away from your ears and rolling them back.
- Unwind your arms on your sides, keeping your palms facing forward.
- Approach your sternum by lifting your chin and focus your eyes gently in front.
- Continue to breathe deeply, with your breaths as consistent and even as possible, in the pose.
- Hold this position for a minute or less and mind your breathing while ensuring that your body is straight.
Tadasana Benefits
Practicing Tadasana regularly offers several benefits:
- Improves spinal alignment and helps to keep proper overall body mechanics.
- Enhances your stability and balance for movement, and success in both work and fitness activities.
- Build arm, leg strength, especially in the thighs, knees and ankles.
- Develops higher body awareness by making you more aware of your movements.
- Promotes bigger mental alertness and concentration due to attentive breathing exercises and quiet times.
Disadvantages of Tadasana
Tadasana is generally quite a safe posture for most people but there are a few things to take into consideration.
Dizziness or lightheadedness: If you experience these symptoms, namely when you stand for a long time, it is safer to practise with a wall or support close.
Low blood pressure: If you feel like your symptoms are increasing in intensity while in the position of remaining still it is advised that you consult with your healthcare provider before having a try at this pose.
Pregnancy: When pregnant, it is recommended that people do Tadasana placing their feet shoulder-width apart to ensure stability.
Recent injuries: Those with ankle knee or back injuries should be careful and seek direction from an experienced instructor.
Tips for Practicing Tadasana
Use a mirror: Practicing in front of a mirror can help you check your alignment.
Focus on breath: Deep, steady breathing enhances the calming effects of the pose.
Incorporate into daily routine: Even a few minutes of Tadasana can help reset your posture during the day.
Conclusion
It is at this point that you are completely prepared to practice Tadasana, a simple, highly effective posture affecting posture, body consciousness and calm, slow breathing.
By understanding how to do Tadasana, learning how to properly execute the exercise and realizing the advantages and limitations of this exercise we see that
Tadasana is not just an exercise of standing upright. Integrating it to your daily regimen can make you become better balanced and attentive, especially if you sit or slump over for long periods. The adoption of even the least habit of standing tall can lead to significant and lasting improvement of your daily activities.
FAQ’s
How often should I practice Tadasana?
Short daily practices may result in better posture and mindfulness.
Can Tadasana help with back pain?
In fact, proper posture can reduce minor back stiffness. However, if you feel discomfort, consult qualified professional medical advice.
Is Tadasana suitable for beginners?
Absolutely. This pose makes a good foundational position for anybody with or without physical limitations.
What are the common mistakes in the steps of Tadasana?
Repeated errors include locking the knees, slumping of the shoulders, unequal weight on the feet, or sticking out the chin. Concentrating on every guidance in the tadasana step list can avoid the repetition of these mistakes.
What’s the difference between simply standing and doing Tadasana?
Regular standing is usually passive. Doing Tadasana, you tone your muscles, correct your posture and turn your attention to your breath. It’s the combination of focused attention and purposeful effort that makes Tadasana specially unique.